Snowman made of papier mache and balls. DIY snowman. Master class with step-by-step photos. Master class of a snowman made of papier-mâché and putty
On New Year's Eve in kindergarten announced a competition for a craft project with your child on the theme “Snowman”. We didn't think for a long time! We decided to make a snowman out of papier-mâché. The child’s only wish was to make a big, big snowman. And that's what we got!
The preparation for making the snowman took a long time. First, it was necessary to make a lot of papier-mâché. Many different options we read and decided to make one out of egg trays. They collected paper trays, tore them into small pieces, poured boiling water over them and left them for a day. This was specially done in the evening so that the mass could be prepared the next day. Egg trays well swollen in hot water. The next step was to put the resulting mass through a combine; you can, of course, knead it with your hands, but it will not be as homogeneous.

They threw everything into a colander to drain off excess water, and additionally squeezed out the water with their hands. We got lumps of gray mass. Then, which our son really liked, they started adding PVA glue (we specially bought a large amount of construction glue, and it took us about 1 kg). Enough glue was added to make the mass elastic. The papier-mâché mixture is ready.


We did it in several passes, because we could not calculate the required volume. Moreover, the mass is stored in the refrigerator in a closed container for quite a long time (we kept it for about two weeks).
Now let's start making a snowman. The base is naturally a ball. To do this, we took three balloons, inflated them of different sizes - for the head and body, and made blanks for arms and legs on small balls from a plastic construction set. The child didn’t even regret a balloon with his favorite Spider-Man))) My son made papier-mâché cakes, and I covered them with them balloons. Then it all dried high on the shelf so that our cats couldn’t reach it))) In time, the blanks dried in 2-3 days and became very hard.


The day has come to collect the snowman. Back in the fall, our thrifty son left behind a wooden handle from a shovel, which he broke. Therefore, when the question arose about what base to put the balls on for the future snowman, he solemnly brought his “treasure”))) Dad screwed the stick to the plywood, and made holes in the balls to put them on the stick base. The result is a very durable structure.


 They began to attach arms and legs. First, the papier-mâché blanks were cut in half, plastic balls were taken out of them, glued together again, and coated with several layers of newsprint with PVA (possibly with paste). We've already done this.
They decided to fasten them using self-tapping screws and a hat elastic tied to them. We marked out the places where the arms and legs would be, made holes and threaded a hat elastic, and attached self-tapping screws to the ends, which were inserted into the arms and legs. The only thing is that the elastic band must be stretched for secure fastening. For strength, the places where the balls connect to each other, the arms and legs were coated with a glue gun.

Now the stage that my son also really liked was painting the snowman. Painted with regular white acrylic paint in two layers.


The next day they began to decorate the snowman. We attached two green eyes, a nose – an orange carrot, sewn from supplex (I once sewed it as a Christmas tree decoration for the year of the rabbit), and a mouth – red beads. Various buttons were selected from the body and shiny snowflakes were glued on. Everything was glued with a glue gun. I sewed a cap with a tassel and a scarf from scraps of fleece that were left over after sewing a fleece children's underwear. Once again I was convinced that any scrap will find its use, this is the thrifty hamster nature in me speaking))) The stand on which the snowman stands was decorated with sisal. They hung a branch with a fir cone in the snowman’s hands and Christmas tree toy. Here he is, our snowman - a snowman and ready. It turned out to be about 80 cm high.


Best regards, admin Kotya! I will be happy to answer your questions in the comments.

Winter is a time of miracles and festive mood. In modern measured life there is often a lack of bright positive emotions and magic. Therefore, on the eve of the New Year, various and interesting crafts. They will come as a surprise and a beautiful gift children and adults.
Papier-mâché is a certain mass from which you can easily form the desired shape. Using this technique allows you to do a lot various crafts with your own hands. To create them, today all kinds of materials are used (cardboard or paper, as well as threads or cotton wool) and an adhesive substance is added.
If you follow the instructions correctly and step by step, then this inexpensive manufacturing technique will help you recreate durable and beautiful jewelry. For example, a snowman craft will be an excellent solution for parents who want to surprise and delight their children.
Technologies for making papier-mâché are:
- Classic technique. Each layer of the product must be glued onto a model from small pieces of damp paper. Their number can reach up to 100.
- Modeling from dough. This is another method of forming the entire product using a special liquid mass of paper with which chalk is mixed. A mixture of glue and paste is added to it. The result is a plastic and creamy dough.
- Pressed papier-mâché Another type is made in the form of plates, gluing cardboard under pressure. The products should be thoroughly dried, puttyed and sanded, and then the design should be applied. The models from which the craft is formed are made of plasticine, clay or wood.
Winter snowman using cotton papier mache technique (video)
Ideas for making papier-mâché snowmen
Today, papier-mâché crafts are very popular. Due to the fact that such decorative elements are created with your own hands, they are very easy to make using scrap materials, many people prefer this technique for making various decorations.

The process itself is reminiscent of unusual modeling, but without the use of ordinary plasticine or clay. Previously, dolls were made using this technique. However, the papier-mâché technique is increasingly being used to create a variety of crafts.
New Year's theme is probably considered the most common. Craftsmen especially love to create snowmen with their own hands. Moreover, the ideas for making them vary.
A snowman made from cotton wool will look good. This technique has been considered popular for quite some time, it’s just that modern colors make it more colorful and interesting.
A detailed master class will be an excellent solution and a snowman made from papier-mâché and threads or a craft using special putty.
Master class of a snowman made of papier-mâché and putty
So, to make a snowman with your own hands you don’t need any special skills. The master class will help you achieve good result and will greatly facilitate the entire process of its creation.
.jpg)
You need to prepare everything in advance necessary materials for the future snowman. You will need newspapers (or other paper), paste (PVA will also work), balloons, decorative paint and putty.
The master class describes how to make the body and head of a snowman:
- At least eight layers of small pieces of paper are glued onto the ball.
- Then these blanks are dried for 3 days.
- The next step is to make the legs. For the legs you will need a small ball. It is pasted over in the same way as the first two parts.
- After drying, all that remains is to cut the ball in half - and the legs are ready.
When all the main components of the craft are dry, you need to connect them and paste them over with several layers of paper. It is desirable that the last layer be white.
Before decorating, the snowman must be completely treated with glue. It is important not to forget about puttying the resulting product. Depending on the type of paint (acrylic, oil or gouache), your own putty is used. Water-based primers work best.
After complete drying, you can use paints for decoration, add all the necessary details to the snowman (nose, hands, etc.) and beautifully decorate the resulting product.
How to make a snowman using papier-mâché and thread
An excellent option for making a craft with your own hands is to use papier-mâché from threads. Moreover, the master class describing such technology is simple and convenient.


Threads are the main component of the product. They should be cotton or viscose. You also need balloons, glue and a large needle.
Master class on technology for making crafts:
- First you need to soak the threads in glue. You can simply put them in a container with PVA, or use a needle to make a through hole in a plastic tube and pass a thread through it. The latter option will allow you to evenly distribute the glue on the surface of the threads.
- Then you need to inflate the balloons, the largest one will be needed for the body. They should be wrapped well and thickly with soaked threads. This is necessary for the snowman to keep its shape. All that remains is to wait for the workpieces to dry and only then begin work.
- After complete drying, the balls are pierced with a needle, and their remains are removed from the resulting balls.
- The threads can be left white (like snow) or painted with special spray paint.
- Using the master class, the craft is completely created. It is necessary to glue the main parts of the snowman, while pressing down the gluing points, this will increase its strength. Next you need to decorate the snowman’s face; everyone creates a suitable image on their own. Cardboard, carrots or other material is used for the nose.
This papier-mâché snowman is quick and easy to make and will make a great New Year's decoration. He will bring a lot of joy and a lot of pleasure to the house.
Snowman made using cotton papier-mâché technique
There is another master class that helps you create interesting crafts. The cotton wool snowman stands out with its funny and charming appearance.


To make a snowman you will need toilet paper, glue (or paste), cotton wool, paints and thick cardboard.
First you need to make a frame. Need to toilet paper Finely tear and mix with glue. You will get a sticky dough-like mass from which the craft is made. Then the pieces should be dried well, and only after that they can be combined into one figure.
The next step will be pasting the resulting craft with cotton wool. It must be glued until the craft is completely covered. You can draw hands from thick cardboard, and make a carrot for the nose from paper. All details are processed with gouache and used to decorate the resulting figure.
The top layer of the product must be covered with white gouache or used acrylic paint. It is recommended to use black to highlight the eyes, buttons, and mouth of the snowman. Everyone can decorate a snowman the way they like best.
How to make a papier-mâché snowman (video)
So, the papier-mâché technique is a great way to create a unique craft with your own hands. You just need a little patience and effort to make a special product that will lift your spirits and become a decoration in any home.
Snowman made of papier-mâché (photo)


I made snowmen to decorate the school hall with my 5th and 6th grade students.
To complete the practical it is necessary to prepare
To make balls for a snowman:
- three thick balloons (photo 1), newspaper (photo 2), sheets of white office paper (photo 3), PVA glue (photo 4);


- * to decorate the snowman:
- mayonnaise bucket; New Year's tinsel; colored cardboard and thick cardboard box.


Making a ball using the papier mache technique (it is necessary to make three balls of different sizes using this technique).
1. Prepare water in a shallow bowl and finely chopped pieces of newspaper.

2. Inflate balloon. Try to tie the balloon well so that it does not deflate in the future.

3. Gradually place pieces of newspaper soaked in water as tightly as possible to each other.

Try to do the job quickly enough so that the pieces of newspaper do not have time to dry. Cover the entire surface of the ball, leaving no gaps, with these pieces of newsprint.


5. Slowly cover the ball with pieces of white paper. Glue them as tightly as possible to the surface of the ball so that the corners of the leaves fit snugly against it. Cover the entire surface of the ball, without leaving any gaps, with these pieces of office paper.

6. This is how smooth your dried paper balloon will be if the balloon does not deflate while the glue dries.

7. This is what your balloon will look like when you remove the balloon, having first untied it and deflated it. The ball can be removed only after the glue has dried thoroughly.

8. You will need three of these balls, different in size, to make a snowman.

9. Place the largest finished ball in a rectangular box. Connect the ball and the box on four sides with tape. Glue the middle one onto the large ball, and the smallest one onto the middle one and start working on the individual parts of the snowman.

10. Attach a decorated mayonnaise bucket to the top ball with tape. Decorate its lower part with New Year's tinsel. Cut out the eyes and mouth from colored cardboard. From colored cardboard, make a cone-shaped nose-mark. Attach all this to a small ball with tape or glue, creating a cute snowman face.
Tatiana Antipova
Snowman from papier-mâché
Winter is children's favorite time of year. In winter you can skate, ski and sled, you can sculpt snowmen, build snow forts, play snowballs.
At this time of year people celebrate New Year. And to decorate our room, we decided to make a cute snowman.
Preliminary work: Reading fairy tales, asking riddles, modeling snowman made of snow.

In order to do papier-mâché snowman, us will be required:
Newspapers or any paper;
Paste (for 0.5 liters of water - 2 tablespoons of flour. Add flour slightly diluted with water to boiling water and stir until thick) or PVA glue;
Balloons (3 pieces);
2 hand sticks;
Paint for decoration.
Making the torso and head snowman.
Inflating the balloons (we will need them for the body and head)
We tear the newspapers into pieces and glue them onto the ball layer by layer, 8 layers in total. (to show the order of layers, each layer is taken from a different paper)

Our preparations take 3 days to dry.
For the legs, inflate a smaller balloon or take any balloon from big designer(if we take a ball from a construction set, we wrap the first layer with wet newspaper so that we can easily separate our work from the ball)
We do the rest in the same sequence as the torso and head. After drying, simply cut in half into 2 parts. (our legs).
For the nose, roll the cardboard into a tube and apply layers on top papier-mâché.

When everything is dry, collect snowman. For this, 2 large balls (head and torso) connect again in layers papier-mâché and wait until it dries. We connect the remaining parts in the same way (legs, arms and nose). It is advisable to go over the last layer with white paper.

After the base has dried snowman, cover its top layer with PVA glue.

We decorate snowman. We draw a face, a carrot nose and create a fabulous mood for the room!


Due to the changeable weather in winter, it is not always possible to make a real beautiful Snowman, with a nose made of carrots, eyes made of coals and a bucket on his head. You have to resort to tricks to make this an unchangeable attribute of the New Year's holiday.
A self-made papier-mâché snowman is a wonderful decoration for your New Year's celebration, which does not depend on weather changes and can delight you even at room temperature.
By spending a little time and old newspapers, you can get such a handsome man who will greet your guests at the entrance to the house. The outfit for the guard can be chosen to suit your taste.
So, now let’s take a closer look at the process of making a papier-mâché snowman. We will need balloons, old newspapers, glue, scissors, white crepe paper, and colored paper for decoration.
The balloons will serve as the base for the papier-mâché snowman frame. Their size determines the size of the craft. Let's inflate them. Next, we glue them together with tape or adhesive paper, as shown in the figure - we get a frame for further work.

Then mix the glue. We tear old newspapers into pieces, soak them well in glue, and stick them on the surface. balloons. When one layer is completely completed, let it dry a little and repeat the procedure again. Make several layers to make the craft more durable.

At the end of this stage, we will get this base for a papier-mâché snowman, made by ourselves. All that remains is to decorate it and decorate it.

stripe corrugated paper fold in half lengthwise. We make cuts at the fold and get a fringe, as shown in the figure.

The next step is to glue the resulting strip onto the balls. We fill the entire surface of the balls with such strips, from bottom to top, the fringe should be directed downward.
To make the holiday even more fun and playful, make it using the papier-mâché technique.

Upon completion, we can make a carrot nose, eyes and ember eyes from a piece of colored paper, and also hang an old scarf around the neck, and a hat or bucket as a headdress. You can also use felt for all this.


Popular
- Kiss tattoo for men. Kiss tattoo. The meaning of tattoos for men
- The safety of plastic toys
- Winter safety shoes: men's and women's, insulated
- Increased protein in urine: possible causes and treatment Quantitative methods of assessment
- We knit booties with knitting needles: elegant and casual patterns, patterns with descriptions and recommendations
- How is World Heart Day celebrated?
- Knitted children's pullover with cat applique
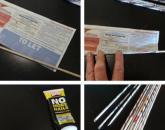
- You need to know this: how to get a ticket to kindergarten - step-by-step instructions for parents
- Birthday card for grandma from her grandson or granddaughter
- Making three-dimensional numbers and letters with your own hands Make the number 7 from a diaper