Pencil drawings are easy and beautiful
Tweet
Cool
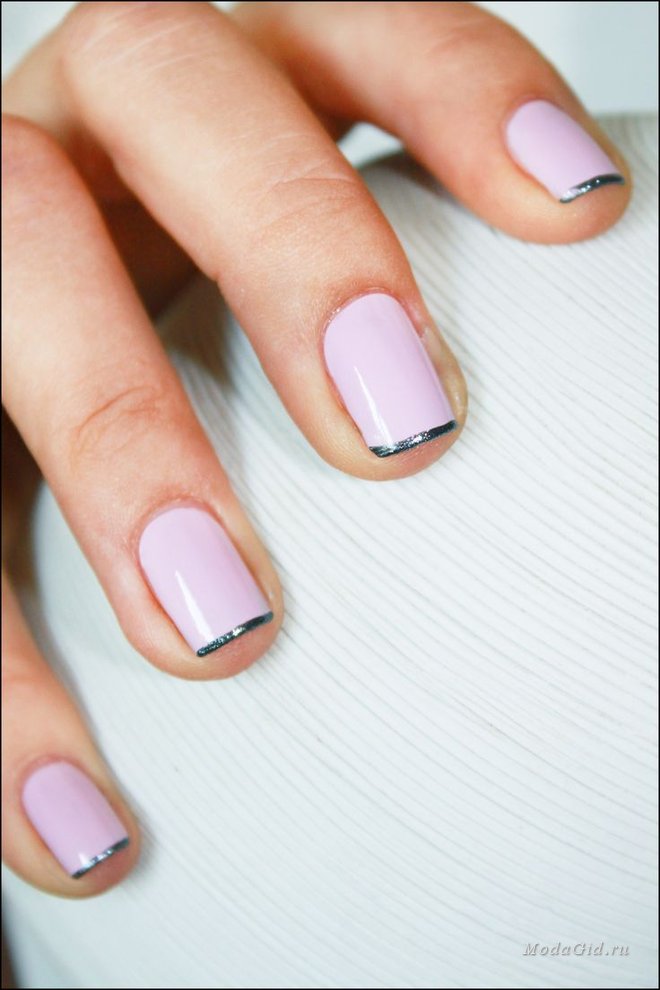
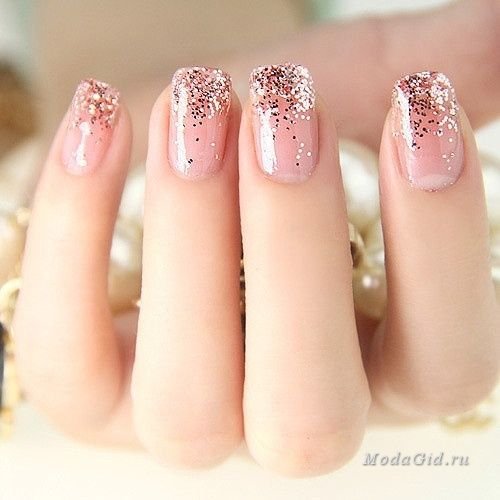
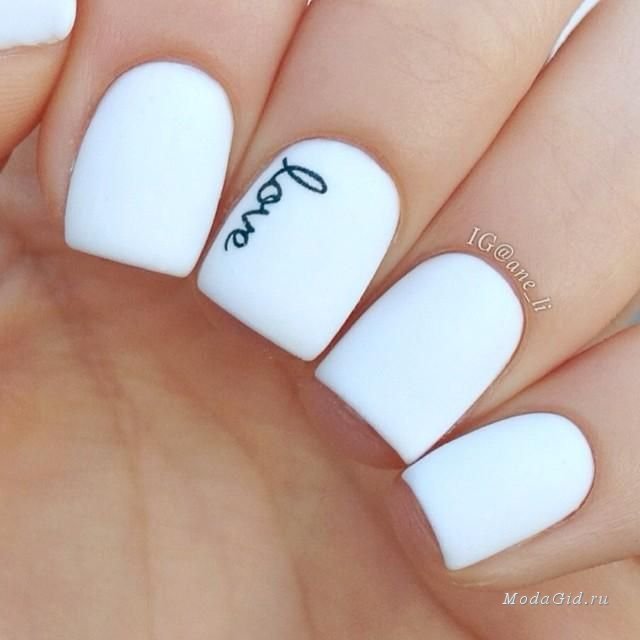
Beautiful and simple nail designs- a great way to diversify your everyday manicure. Making such a manicure is not at all difficult, and at the same time, simple nail designs are in trend today. There are many ways to create beautiful nail designs at home. Today we will focus on simple techniques that are suitable for beginners.
Simple designs on nails using tape
Scotch tape is a faithful friend of all novice manicure lovers. You can use special adhesive strips that are sold in stores to create a manicure. But you can get by with regular tape.
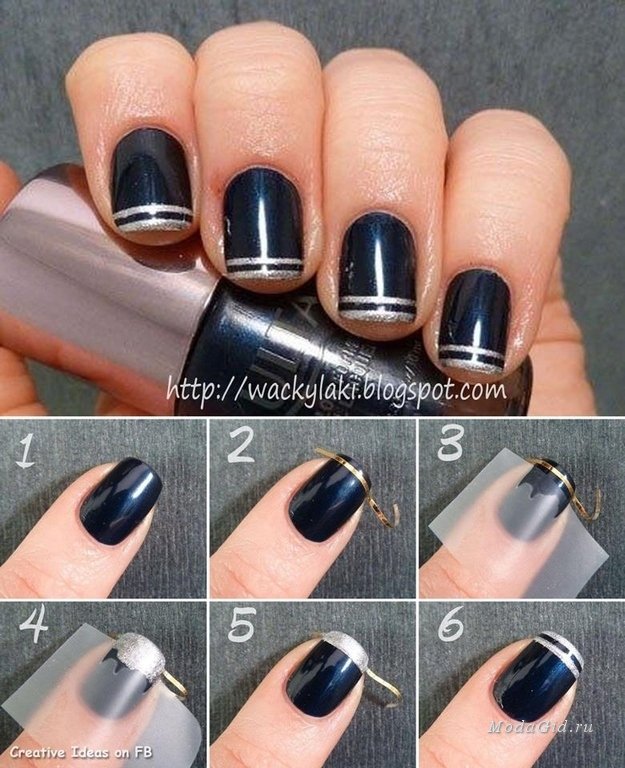
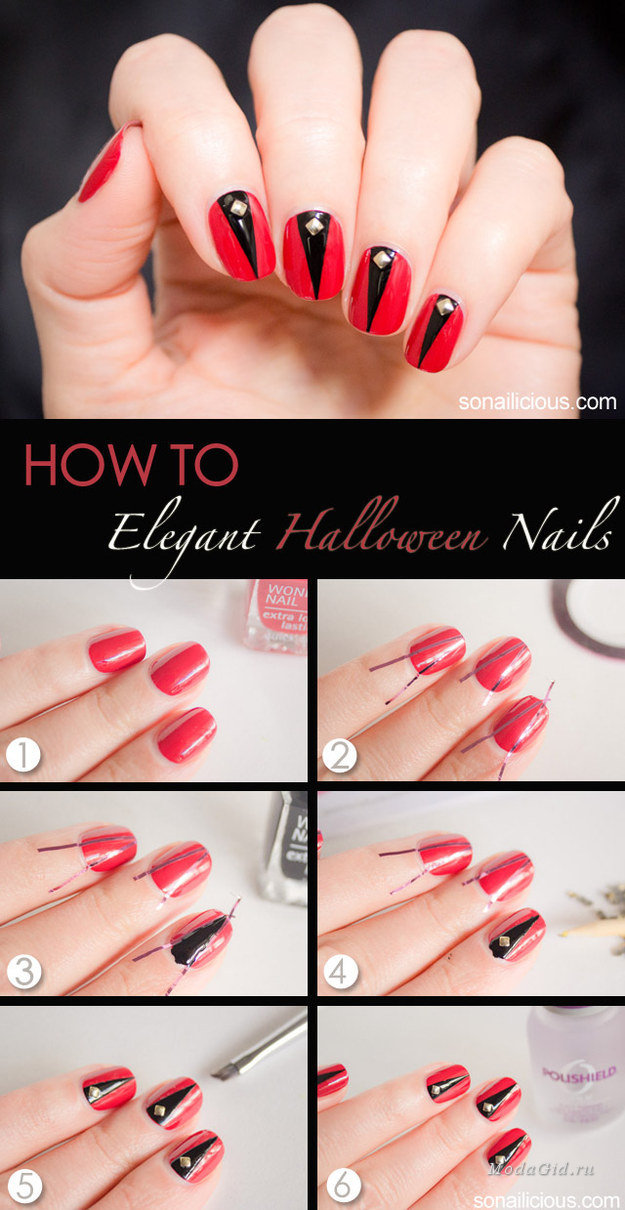
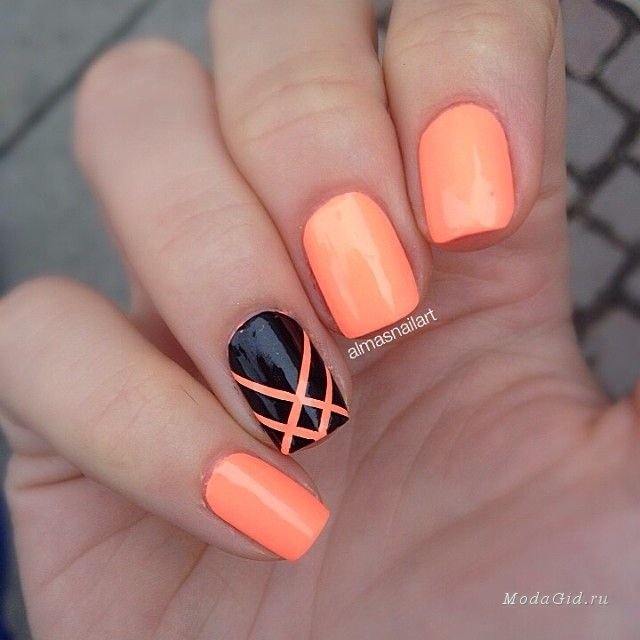
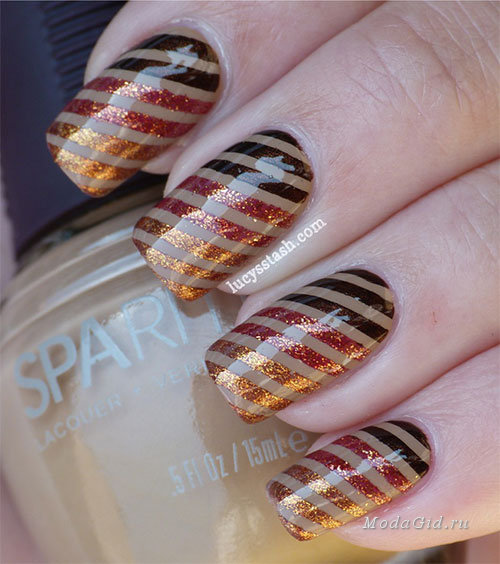
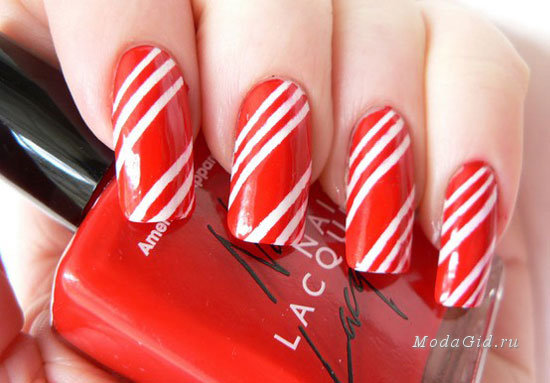
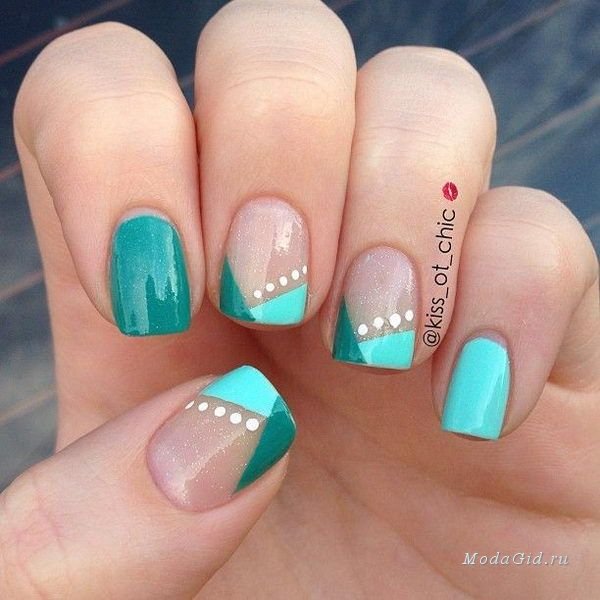
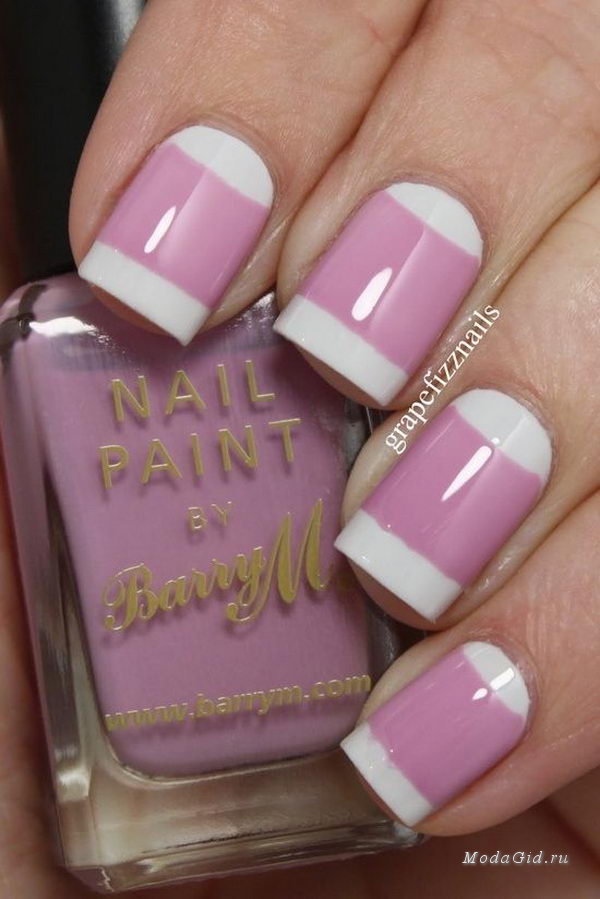
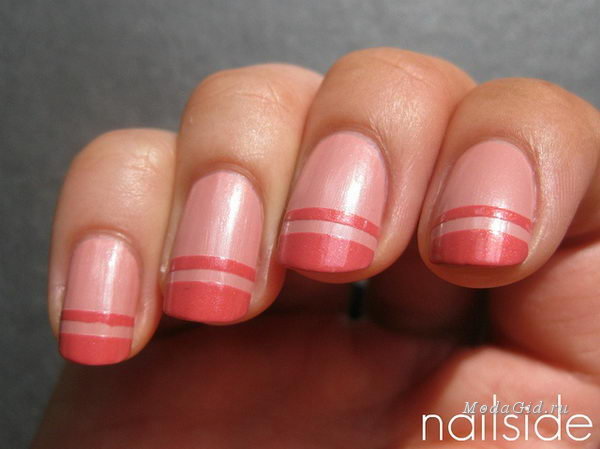
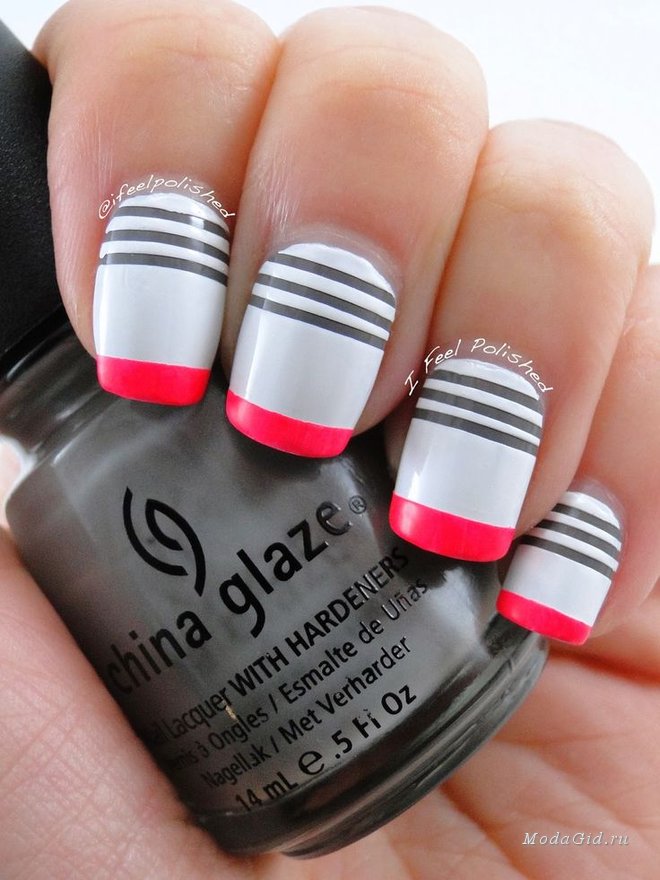
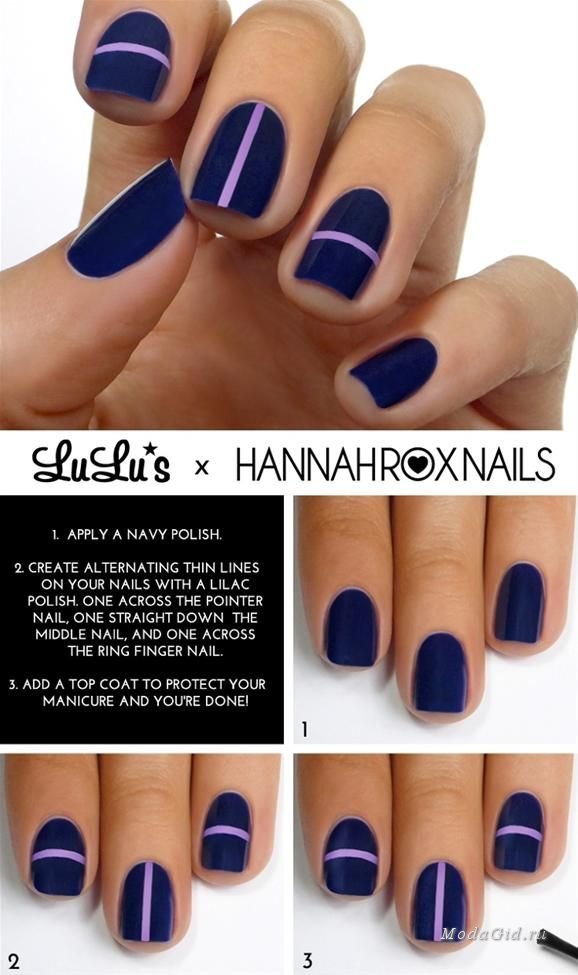
The simplest manicure using tape is a manicure with various stripes or color blocks. First, you cover your nail with one color of polish and wait for it to dry. Then stick tape on half of the nail and cover the second part of the nail with another varnish. This way you can get a very simple but beautiful two-color manicure.
In a similar way, you can create several stripes on the nail, as well as various geometric shapes and color blocks.
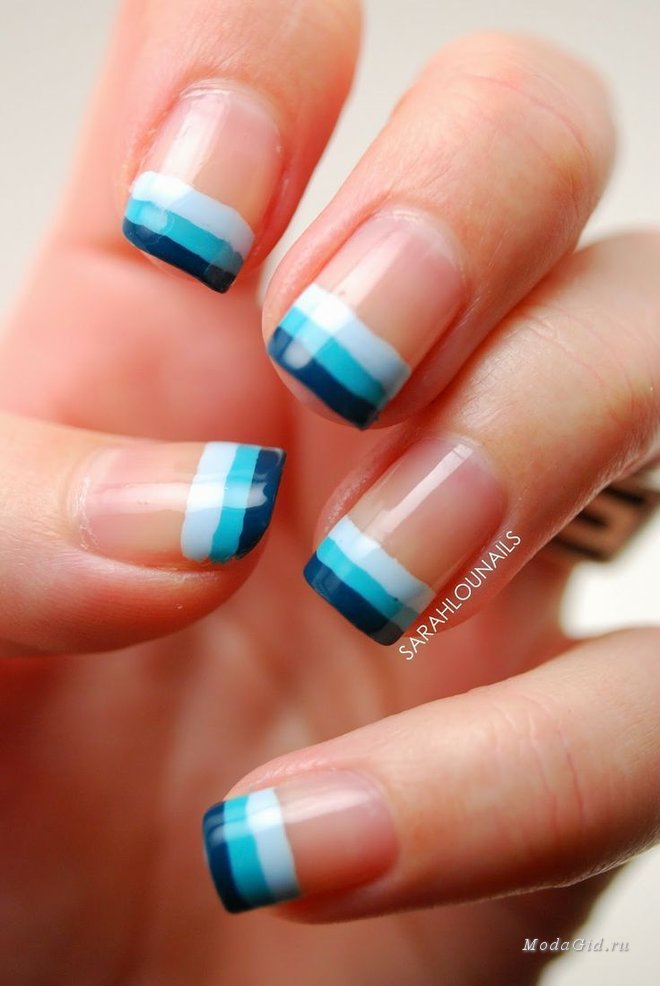

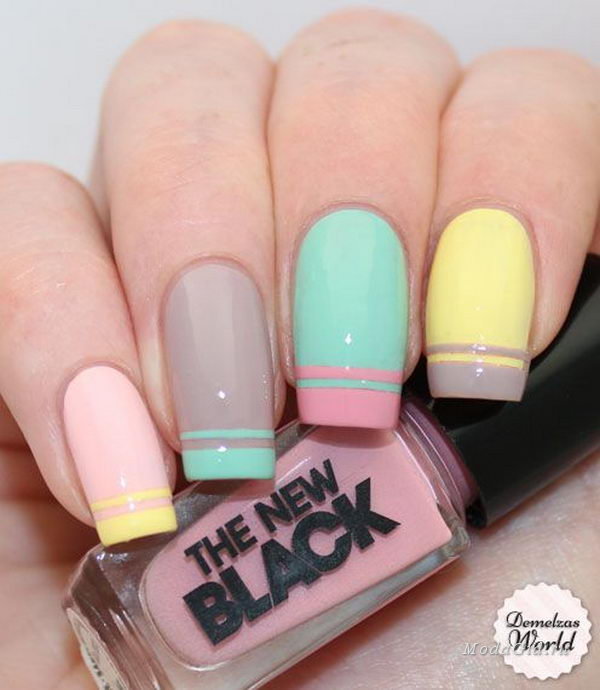
Photo tutorial on how to create simple manicure with tape

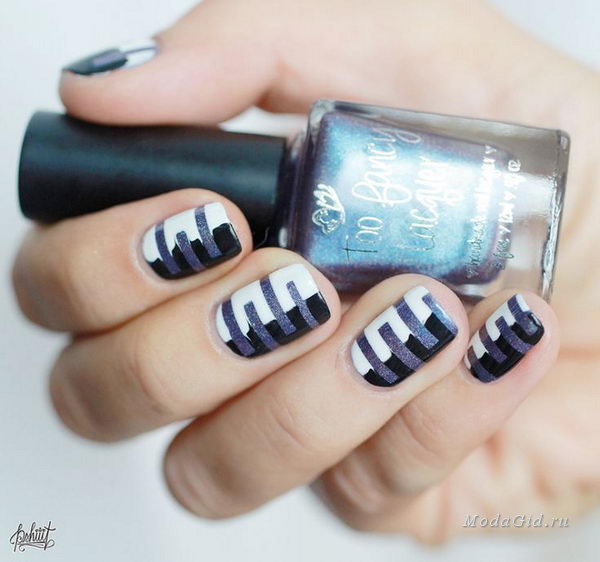
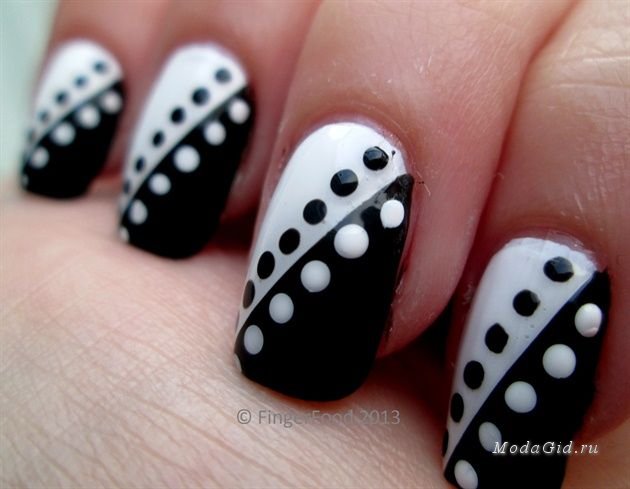
Another option for creating a simple but effective manicure using tape is to cut out a template of the shape you need from tape. These can be thin stripes, circles, etc.
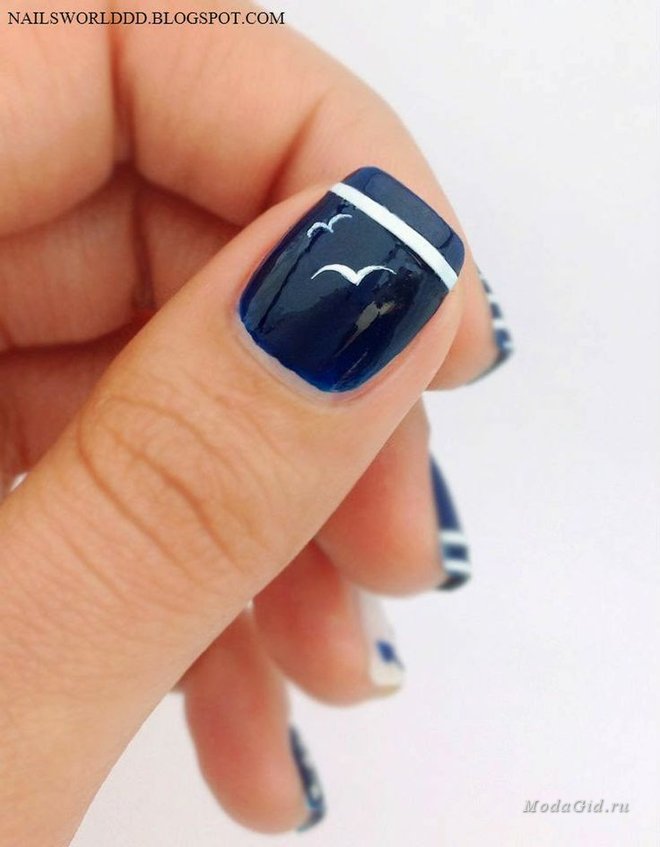
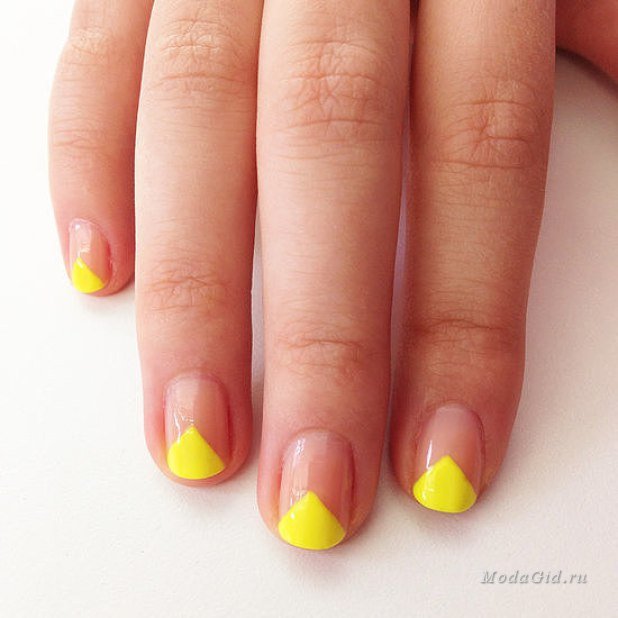
Photo tutorials on creating simple designs on nails

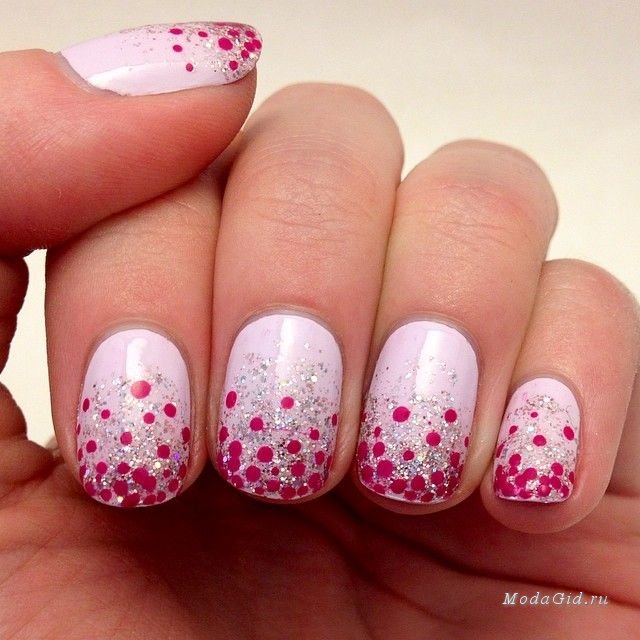
Photos of simple designs on nails


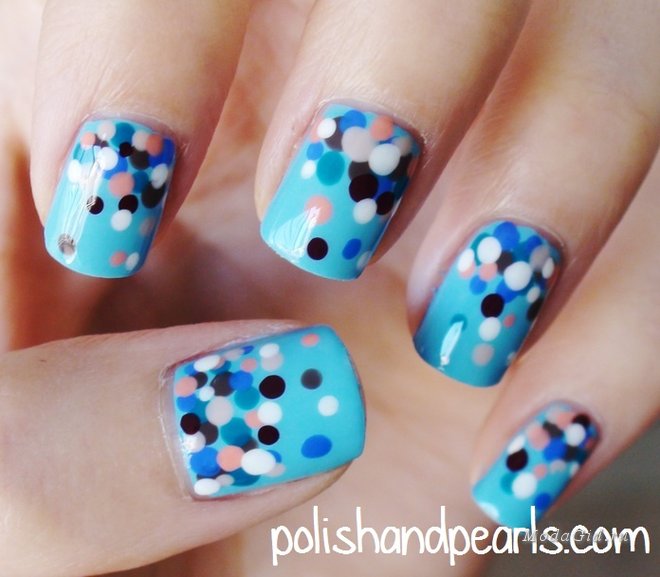
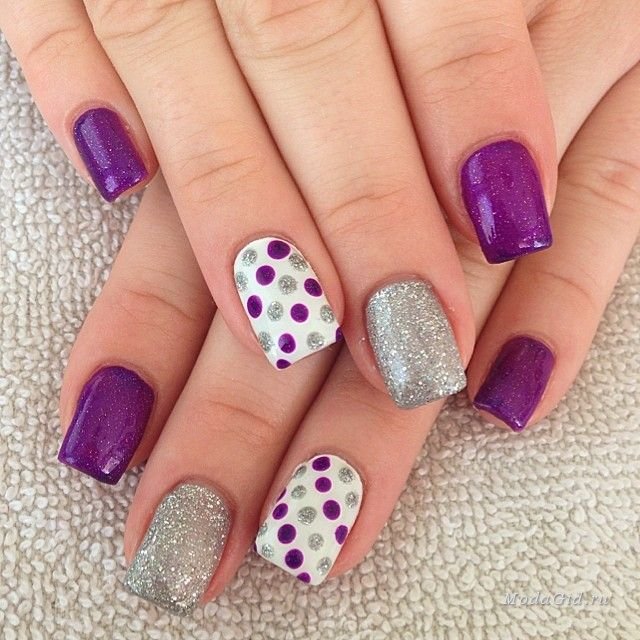
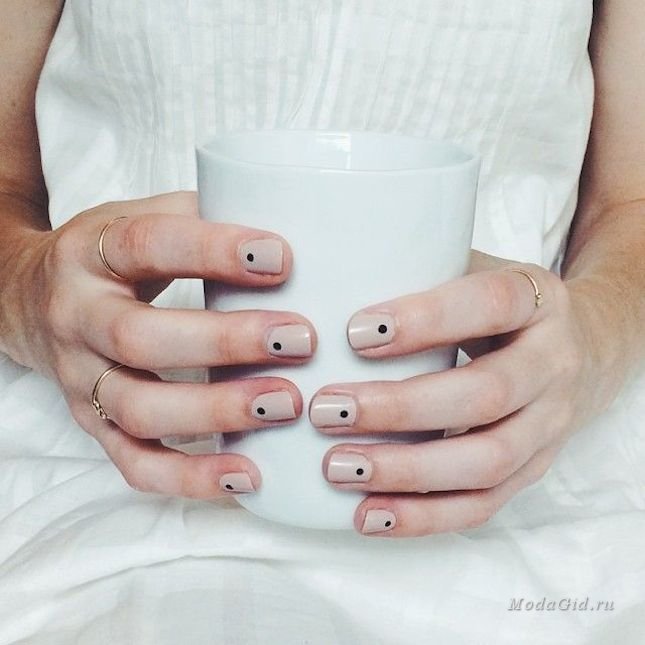
Simple nail designs with dots
The most common dots of different colors and sizes will help you create a huge variety of simple designs on your nails. Special tools are sold to create dotted nail designs, but you can do without them. To perform a manicure with dots, you can use various things that are in any home: hairpins and bobby pins, old pen refills or pencils, toothpicks.

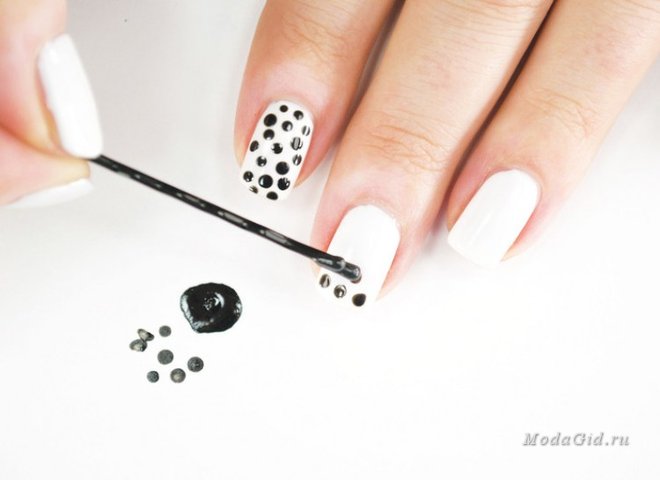
If you have found enough small objects at home that allow you to create dots of different diameters on your nails, then you can start experimenting. For inspiration, look photo of a simple manicure with points below.


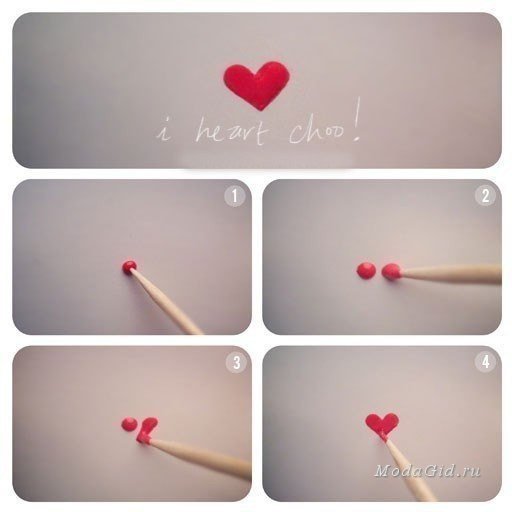
Simple manicure with a needle
Manicurists can create truly complex and beautiful designs with a needle. But since the article is devoted to simple nail design for beginners, I offer you a very simple video tutorial on how to create a manicure using a needle. It looks almost like a water manicure, but doesn't require as much effort.
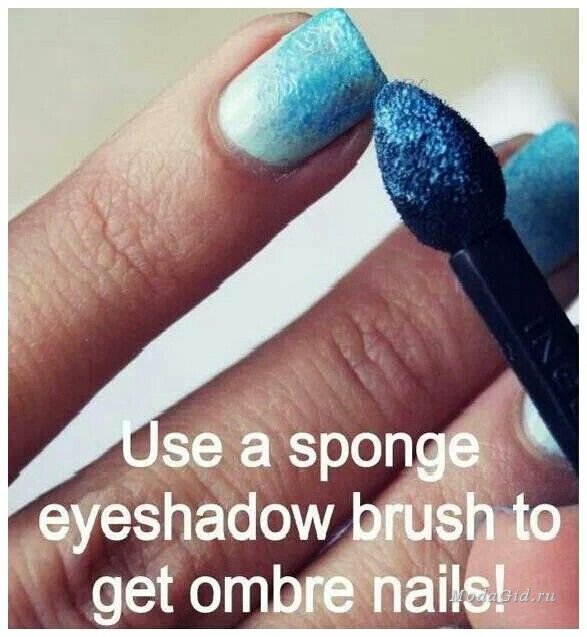
Gradient on nails
Many people love a beautiful transition of color on their nails, but not many can easily create such a design on their nails. But everything will become much easier if you know one manicure life hack. You can quickly and easily create a gradient on your nails using a sponge and eye shadow. All you need to do is coat your nails with varnish, which will be the main color in the manicure, and wait until the varnish dries, but does not dry completely. After this, apply eye shadow of a matching color using a sponge and cover the nail with clear varnish.
Another easy way to spice up your manicure is to add glitter to it. You can use varnishes with glitter or, again, eye shadow.

And one more important point. If drawing on your nails is difficult for you (especially with your left hand!), then start with a simple manicure, where the drawing is done on only one nail.
After all, it’s always easier to draw or write something on one nail and you’ll definitely succeed. And over time, your skills will get better and better and you will be able to move on to more complex drawings. Have a great manicure everyone!
Many ideas are beautiful, simple, funny pictures for sketching in personal diary.
Easy, simple and beautiful step by step for beginners for sketching in a personal diary with pencils
Many people dream of having a personal diary. But some people don’t know how to keep a personal diary or what to write about. In this article we will tell you not only how to decorate your personal diary using drawings, but also give tips regarding the content of your personal diary.
Important: A personal diary conveys the state of a person’s soul. You can keep a diary if you want to speak out, understand yourself and your feelings, or simply tell the story of your life or certain episodes.
Keeping a diary is a purely personal matter. Therefore, there are no specific frameworks regarding what a personal diary should look like. It can be a huge notebook or a small notepad; you can make notes in any colors. In general, as your soul desires.
Recently, it has been fashionable to make sketches in a personal diary. If you don’t know how to draw beautifully, it doesn’t matter. We suggest you start by mastering simple drawings. All you need is perseverance and a little diligence to draw a picture step by step.
You can see step-by-step picture options on the theme “Love” below.

Teddy bear with heart
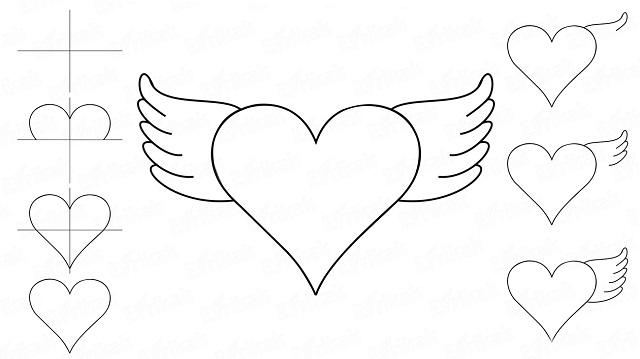
Heart with wings
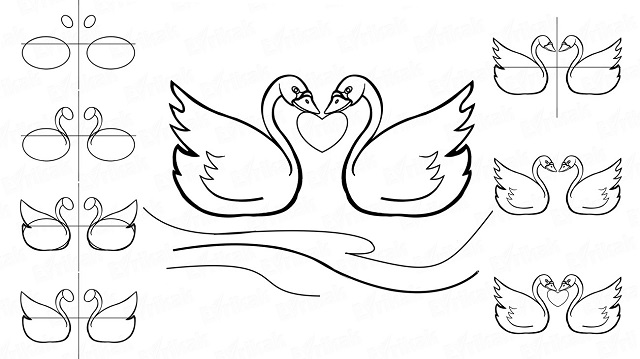
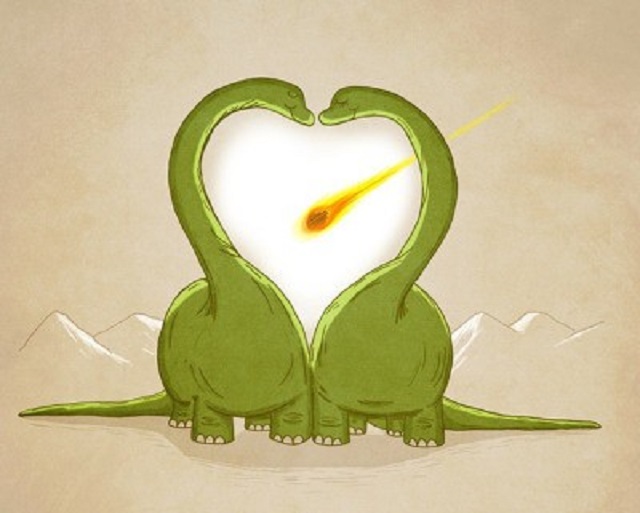
Two swans in love
Variants of pictures for sketching on the theme “Animals”.
How to draw a cat step by step

Hedgehog drawing
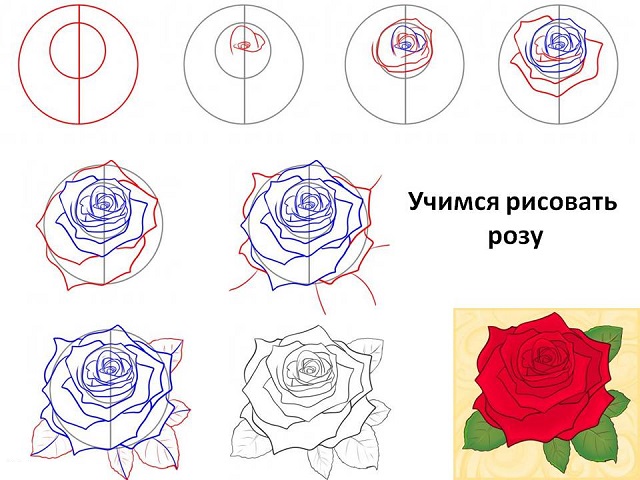
Options for sketches step by step on the theme “Flowers”.
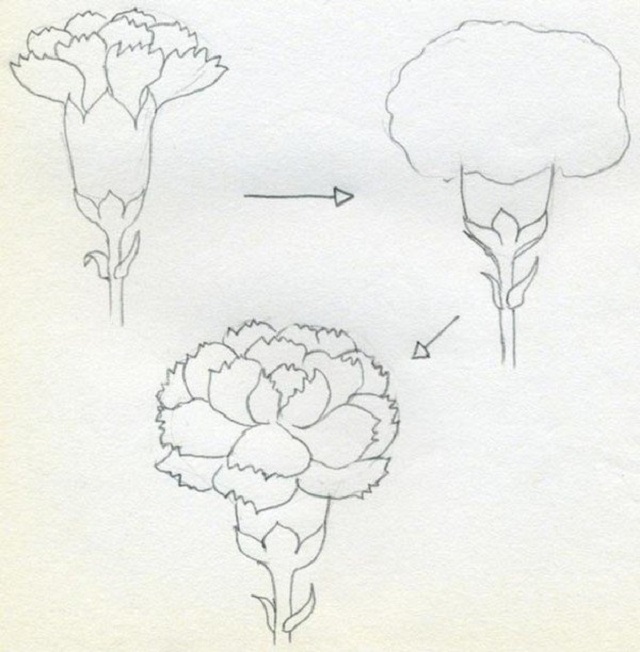
Carnation in pencil

A little more simple pictures for sketching in a personal diary.

How to draw Winnie the Pooh step by step
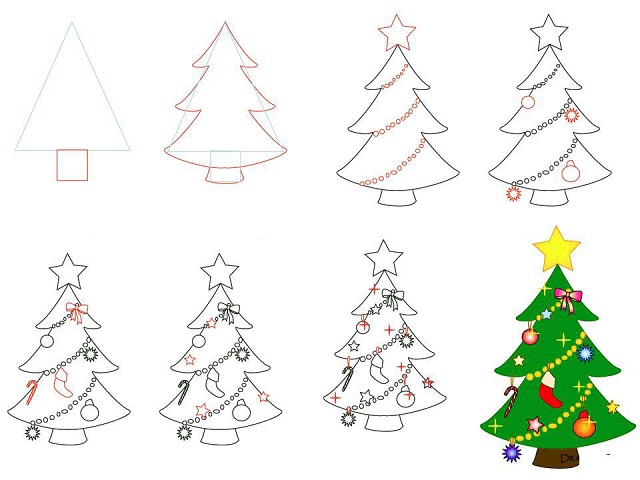
Christmas tree
Video: Simple braid patterns for a personal diary
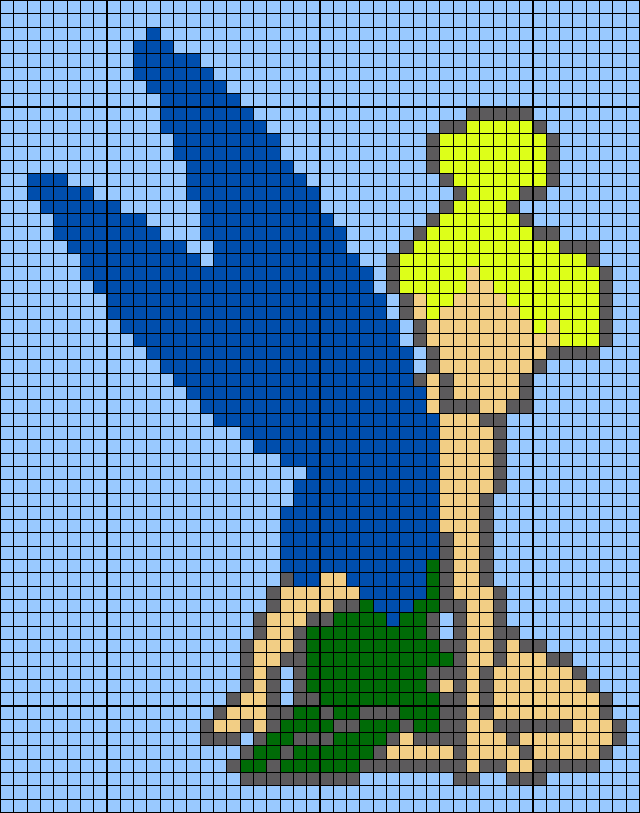
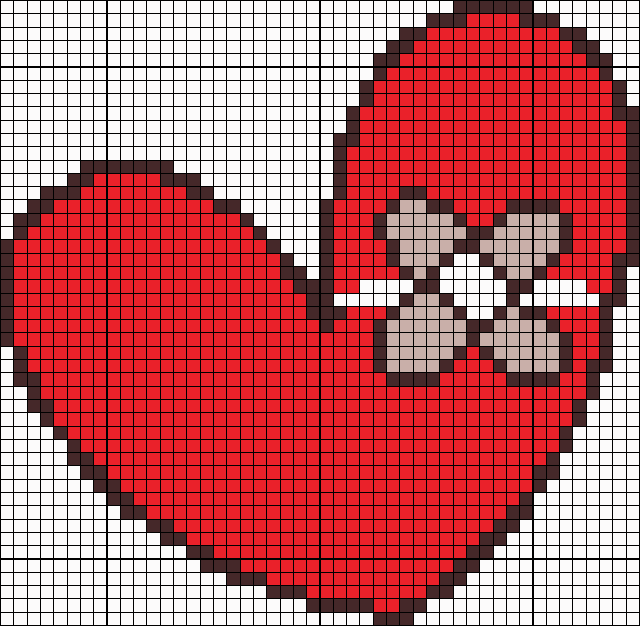
Black and white and small drawings in cells for sketching in a personal diary
We have not yet covered the main topic related to keeping a personal diary, namely: what to write about in your diary? So, here are some ideas for keeping a personal diary:
- The first thing that comes to mind is transferring your personal experiences, events, emotions and feelings onto paper. On the pages of your diary you can be as frank as possible, because these are your personal secrets.
- You can also describe events that happen to you in chronological order. It is desirable that these are bright and interesting moments. Believe me, after many years these recordings will make you smile with tenderness.
- If you write poetry, you can write it in your journal. A great idea to preserve and perpetuate your creativity.
Important: Drawings in a personal diary can convey the state of your soul. For example, sadness, joy, love, anticipation of a holiday.
If you keep a personal diary in a squared notebook, you can try drawing in the squares. Thanks to the diagrams below, you will easily master this drawing technique.
![]()
Pokemon Pikachu
Thumbelina
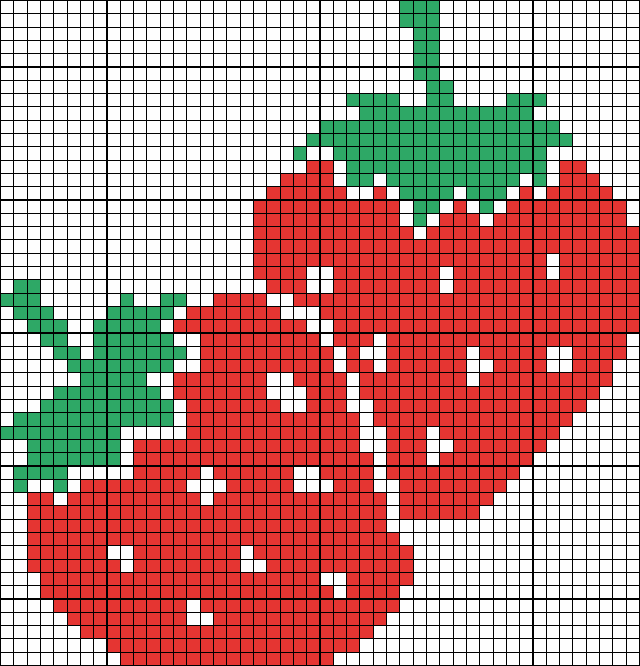
Strawberry

Winking smiley

Boy and girl

Monster High
Cute drawings for sketching in your personal diary
Important: A personal diary is a special notebook; it is stored for many years. It is advisable to decorate your personal diary beautifully; for this you can use available tools.
The first step is to design the cover. To appearance your diary is kept fresh, the cover should be hard. In order not to bother, the easiest way is to immediately buy a notebook with a hard cover, and then decorate it. The following materials are most often used to decorate the cover:
- Textile
- Lace ribbons
- Rhinestones and beads
- Clippings from glossy magazines
- Stickers
On the first page of the diary, you can write a little about yourself, write statuses and quotes that you like, and draw a cute picture. Cute drawings on the pages of the diary will enliven it and make it beautiful.
Cute drawings for ld
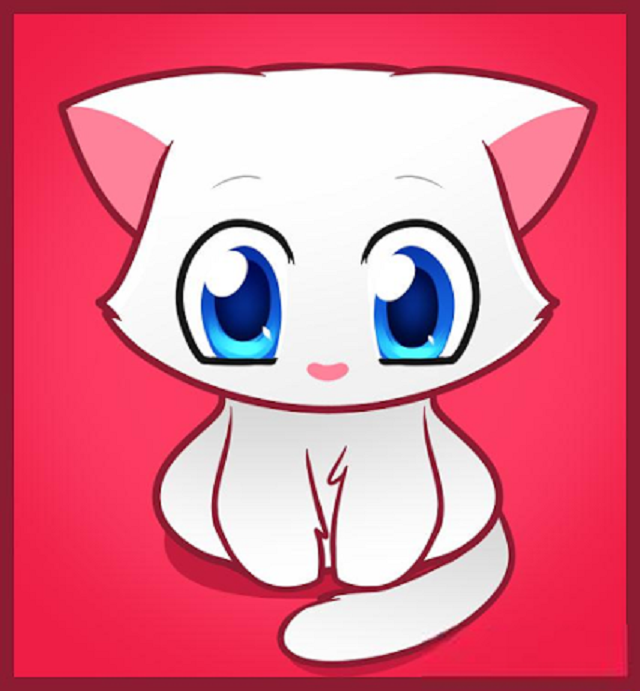
Cute cat
![]()

Pictures for ld
Cute drawings for ld
Drawings for sketching
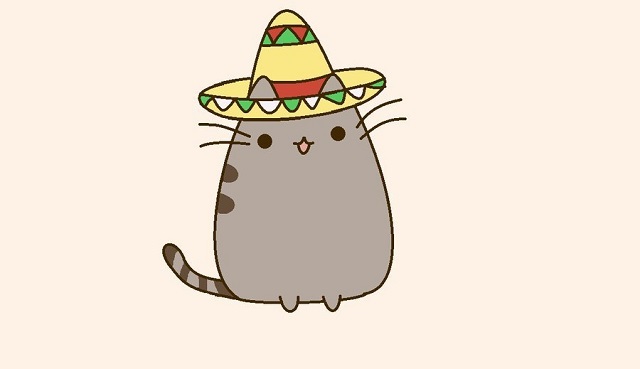
Nice cat
Cool drawings for sketching in your personal diary
If you decide to draw in your journal, try creating drawings that are relevant to the event being described. For example:
- Drank tea with girlfriends - draw a cup;
- There was a meeting with a lover - a heart;
- If you are waiting for a holiday - a gift;
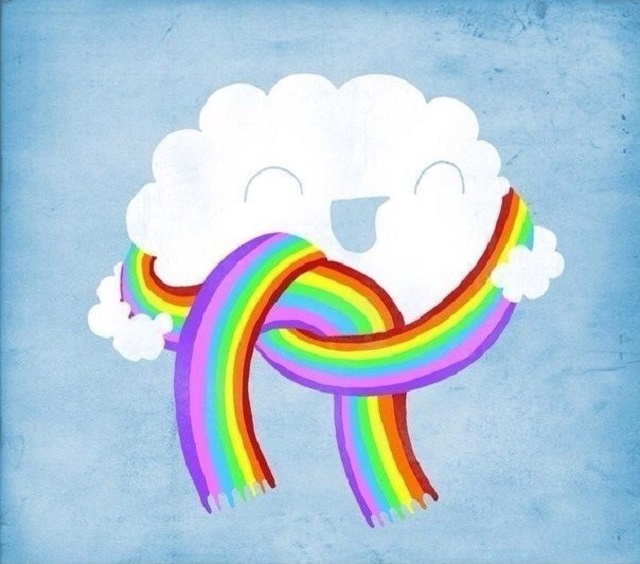
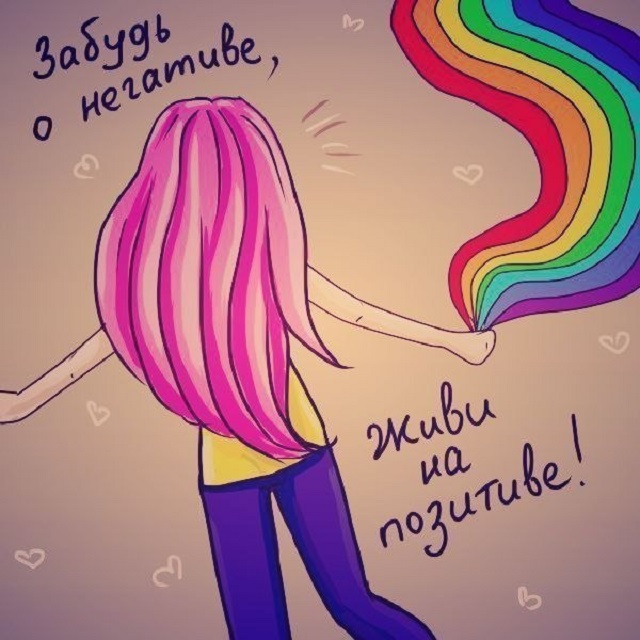
- Good mood - rainbow.
As you can see, imagination in this regard is limitless. Everyone has individual approach to keeping a diary, we only give tips and advice.

Cool pictures for sketching
![]()
Drawings for a personal diary
Cool drawings

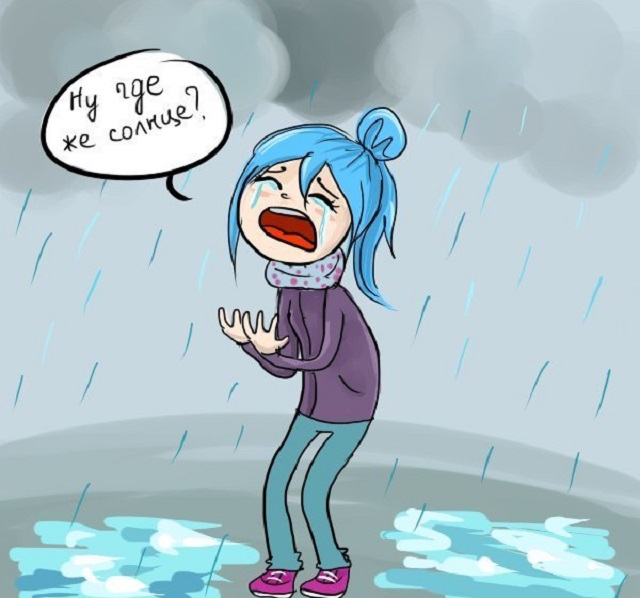
Girl under an umbrella
Video: Ideas for a personal diary
Cool drawings for sketching in your personal diary
Important: Both color pictures and black and white ones look great in a personal diary. Using a simple pencil you can create very deep and rich pictures.
You will see this when you see the pictures below.

Black and white drawings for sketching

Cheshire cat
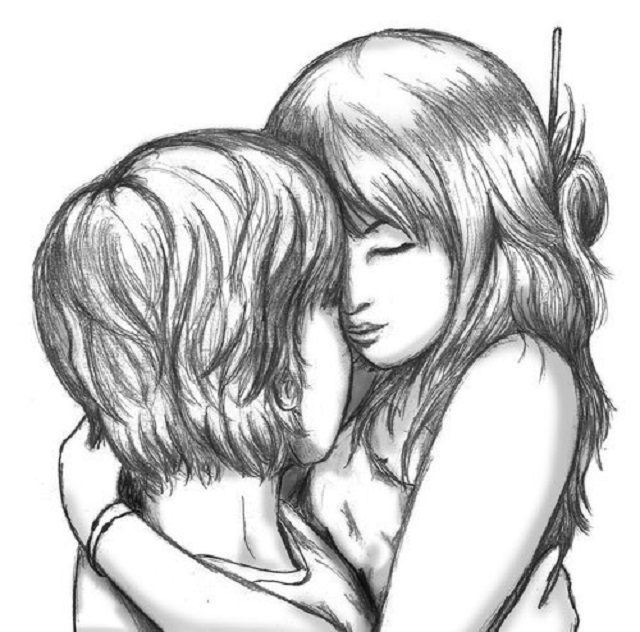
Love
![]()
Some more cool color pictures.
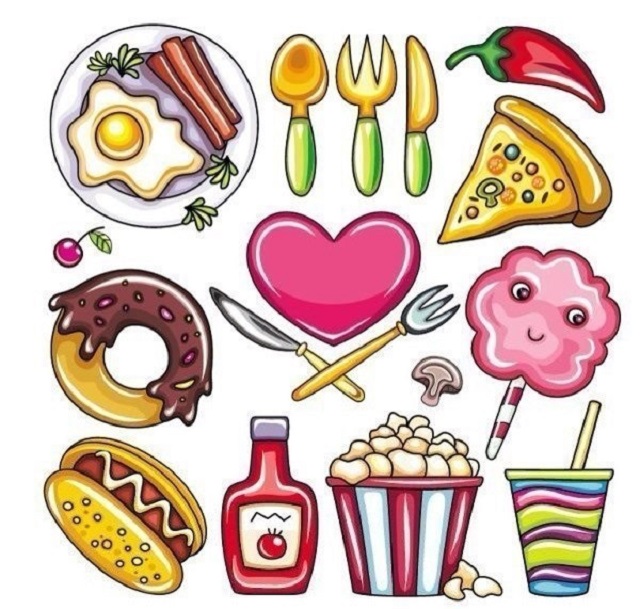
Pictures for sketching on the topic “Food”
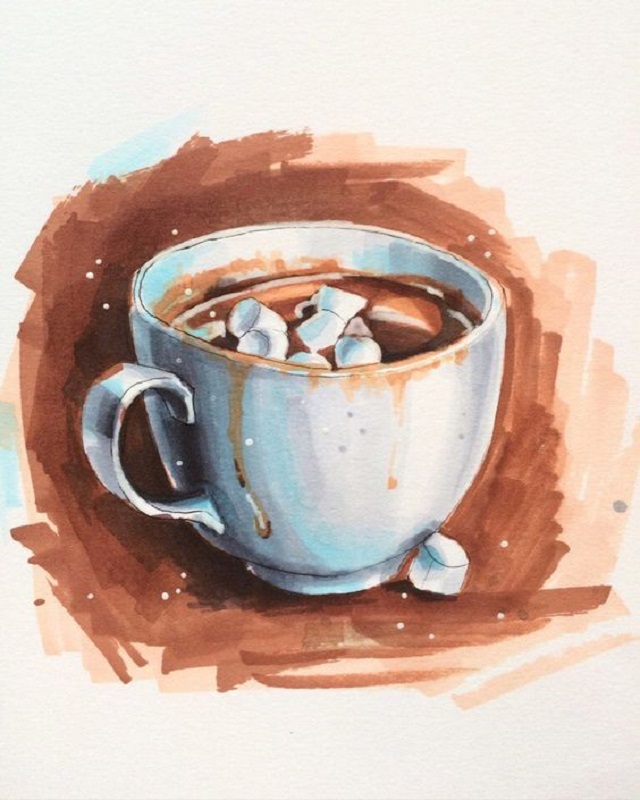
Cup of coffee
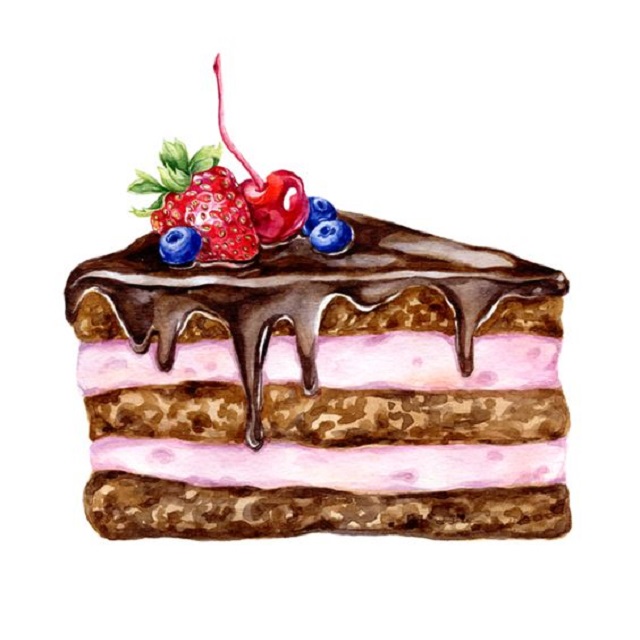
Piece of cake
Important: When to write in a personal diary? Your diary will be more colorful and interesting if you don’t make entries under pressure. It’s better to make notes less often, but at the call of your inspiration.
Drawings for boys for sketching in a personal diary
Not only girls, but also boys can keep personal diaries. And if girls draw more feminine pictures in their diaries (shoes, love, flowers), then boys prefer drawings that are more typical masculine character. For example: cars, superheroes.
Pictures with food, animals, abstractions and many others are also suitable for sketching in a boys’ diary.
Below is a selection of pictures for sketching in a personal diary for boys.
Dinosaurs

Wolf in headphones
Pictures for a personal diary

Pictures for drawing

Ideas for a personal diary for boys
Simple step by step drawings
Drawing ideas for a personal diary, sketchbooks
Now a few words about where to keep your personal diary. There are several ideas for this:
- Carry a personal diary with you. If your diary is always at hand, you can write or draw at any time when inspiration strikes.
- Keep it in your room. There is probably a secluded place in your room that only you know about. Some people keep personal diaries in the linen closet, others hide them under pillows or a mattress.
- Turnkey diary. You can keep a personal diary in a notebook that has a lock and always carries the key with you.
Original idea for sketching

Shoes - sketch for girls

Beautiful drawing for a personal diary
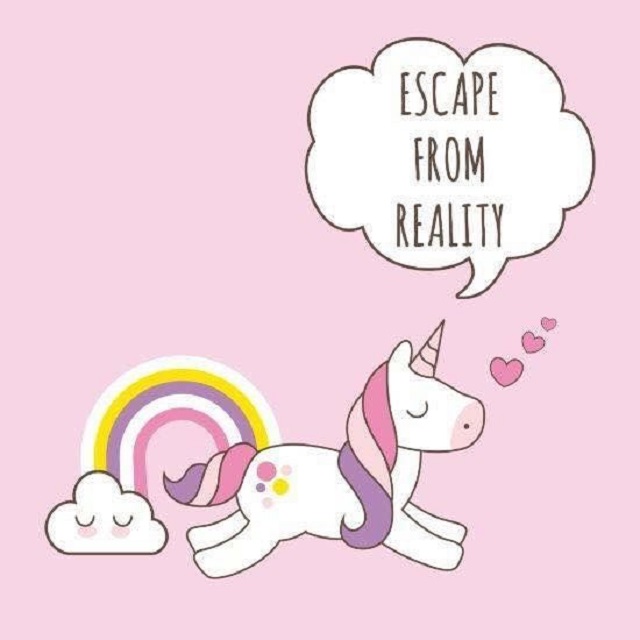
Unicorn, rainbow
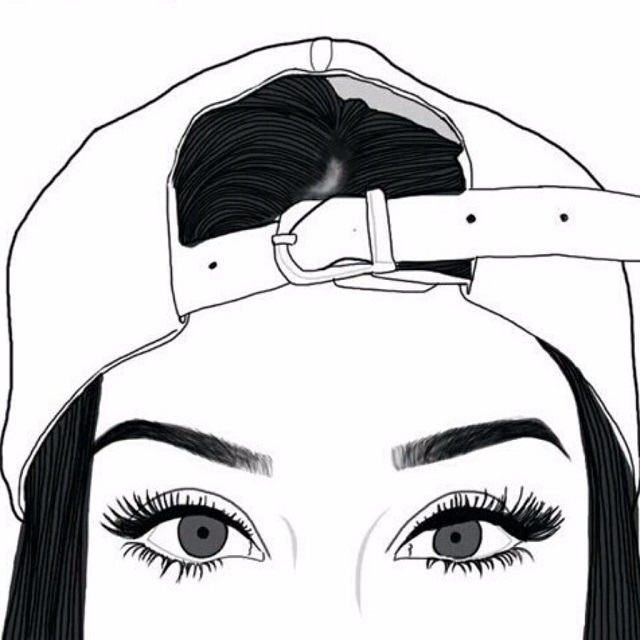
Girl's face

Cute ice creams
We hope that the selection of pictures for sketching will be interesting and useful for you. And soon you will decorate your personal diary with them. Keep your secrets beautifully! And finally, we suggest watching a video that contains ideas for pictures for a personal diary.
Beautiful and simple drawings in pencil, watercolor and even paintings made of stones. Cake decoration using acquired skills.
How to create simple drawings step by step?
Learning to portray animals is useful knowledge for children and adults. It will be useful first in kindergarten, school, and the second - for creating knitted patterns, fabric appliqués, and decorating cakes.
How to draw a penguin?
See how to create this flightless bird.

For this you will need:
- simple pencil;
- eraser;
- sheet of paper
They create such beautiful drawings with a simple pencil. Because then it will be possible to erase unsuccessful and auxiliary features and draw new ones. Therefore, do not press too hard on the pencil.
- Draw a small circle - this is the head of the penguin. It is crossed by the oval body of this animal, but at the bottom make this figure straight.
- At the next stage, draw 2 rounded features - the first is almost parallel to the back of the head, and the second is to the left side of the body. If you then want to draw in color, these features will help keep the face and belly white and the individual elements black.
- Next, we draw the underdeveloped wings of the penguin bird, two small ovals at the bottom of the body, which will soon turn into the paws of this animal.
- You will make them more realistic in the next step. To do this, draw 3 toes on each paw. A small circle on the face will become the eyes of this bird, and it will also acquire a beak.
- It remains to show that his fur is quite fluffy. To do this, make several small lines on the tummy, back, and back of the head. Draw the crest. Add an eyelid and pupil to the eye.
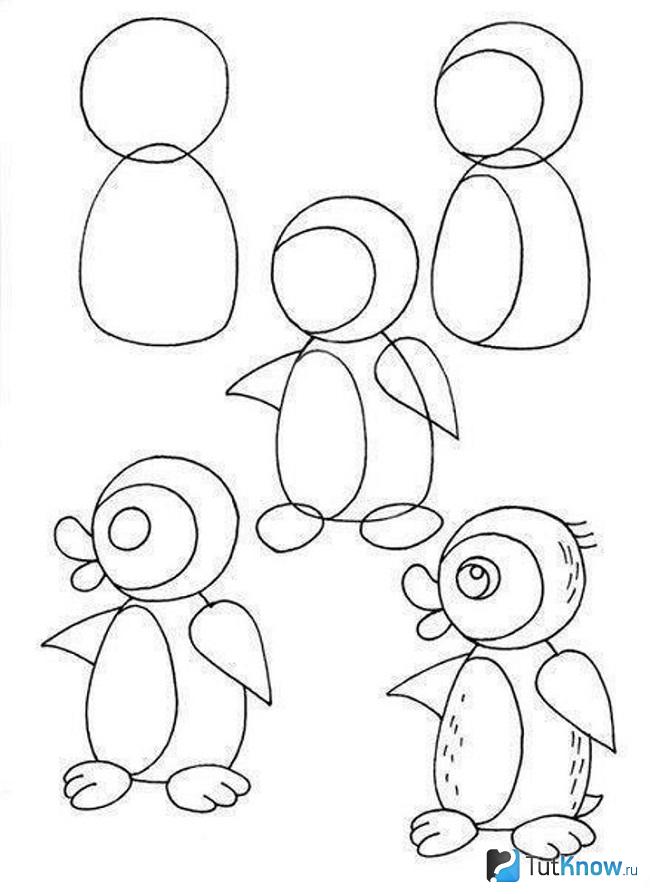
Here's how to draw a penguin simply and easily. You can also create other animals using the same technology without any problems.
How to draw a pig?
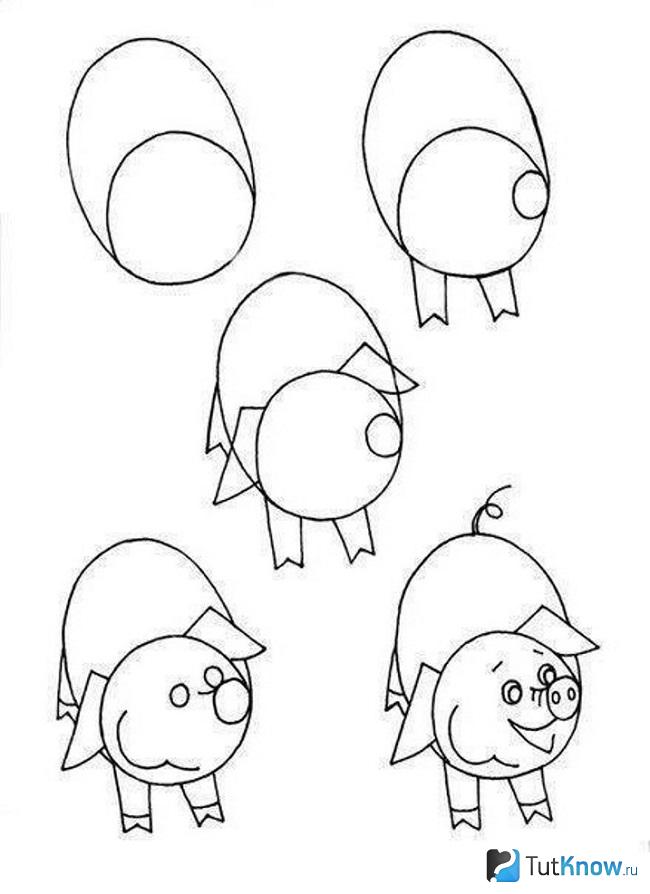
- Draw a figure oval shape. At its lower part, draw a circle that will become the pig’s head. His little snout is depicted on the right side of this circle.
- Draw his 2 front legs, one back, and his lop-eared ears.
- Mark the animal's hooves, cheeks, and outline its eyes. At the next stage, draw in them the pupils, as well as the eyebrows, mouth, and nostrils.
- The look of the mischievous pig is completed by its curled tail.
How to draw a donkey?
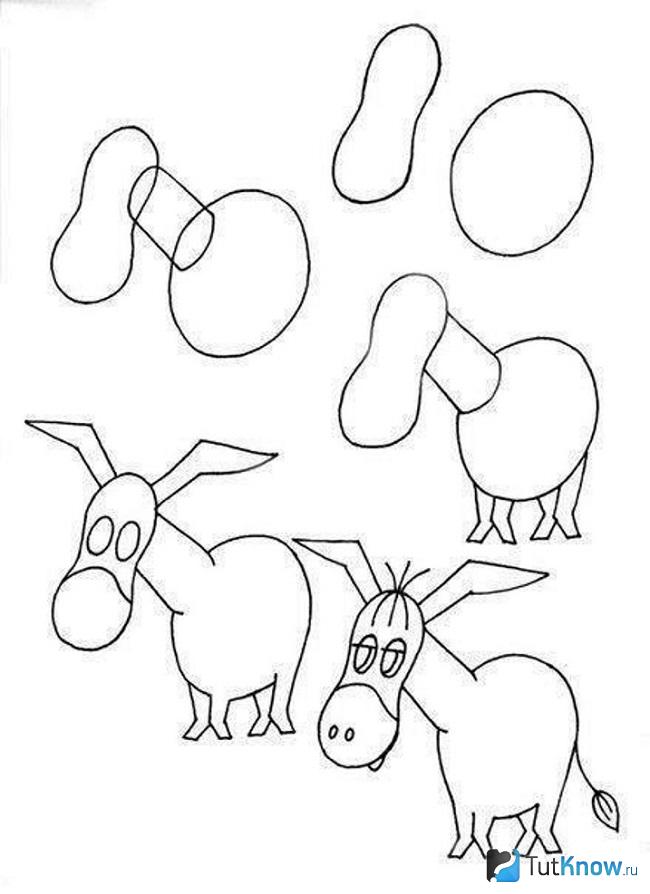
Having learned this, you and the children will be able to start illustrating the cartoon about Winnie the Pooh.
- First, draw a figure similar in outline to the number 8 - this is the head. The circle will soon become his body. An elongated neck connects these parts.
- Draw the ears that look like small wings next. The two oval eyes will get pupils and eyelids in the next step. Then draw the nose and nostrils.
- All that remains is to depict the bangs, crest, legs of the donkey and his tail.
How to draw a lamb?
The image of this animal can also be used for applique. But make a fur coat from fur or glue curls from pieces of thread onto the base, twisting them.
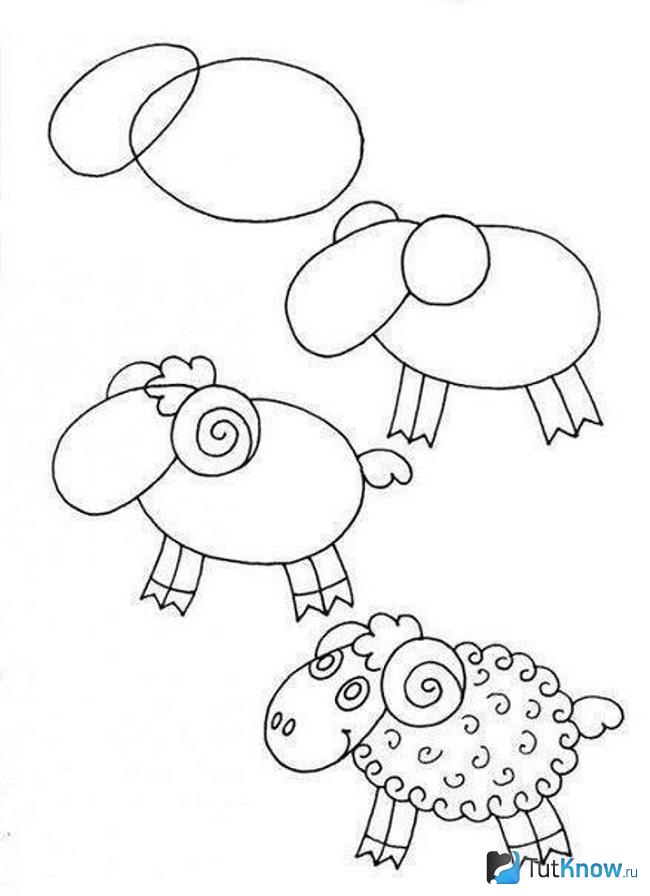
Photos show how such simple drawings are created step by step.
- First draw a small egg-shaped shape that will become the lamb's head. And the body is a slightly larger oval.
- To make drawing the horn easier, first draw a small circle on the side of the head. And then draw a spiral horn in it. The second one is located in the background and is not completely visible.
- Four rectangular legs end in hooves. Curly bangs will add charm to the animal.
- Draw his dreamy eyes, curly fur, nostrils, and tail.
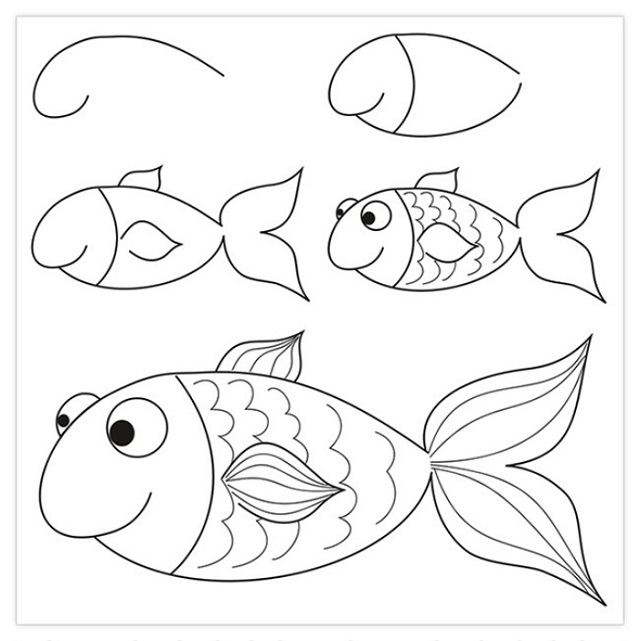
Fish

If you are thinking about how to teach drawing to a small child, then show him how this sea creature is created.
- Draw a semicircular line at the top and bottom, connecting them on the right and left. Draw the lips on one side and the tail on the other. Separate the junction of the face with the body with a semicircular line, draw a round eye on the muzzle.
- In the next step of step-by-step drawing, add an eyelid to the eye and draw two fins.
- All that remains is to draw the pupil and scales using wavy lines. Using small strokes, make the fins and tail more realistic.
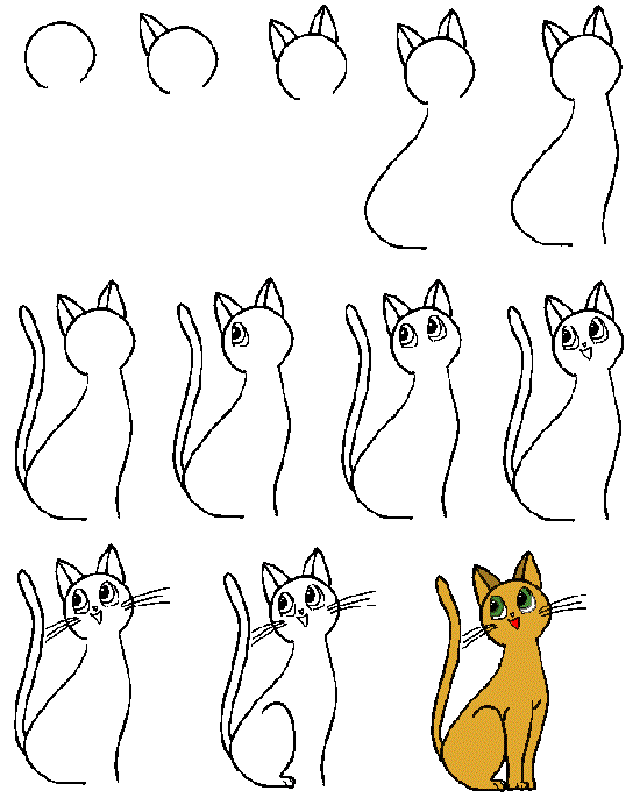
How to draw a cat?
You will learn this in 5 minutes.
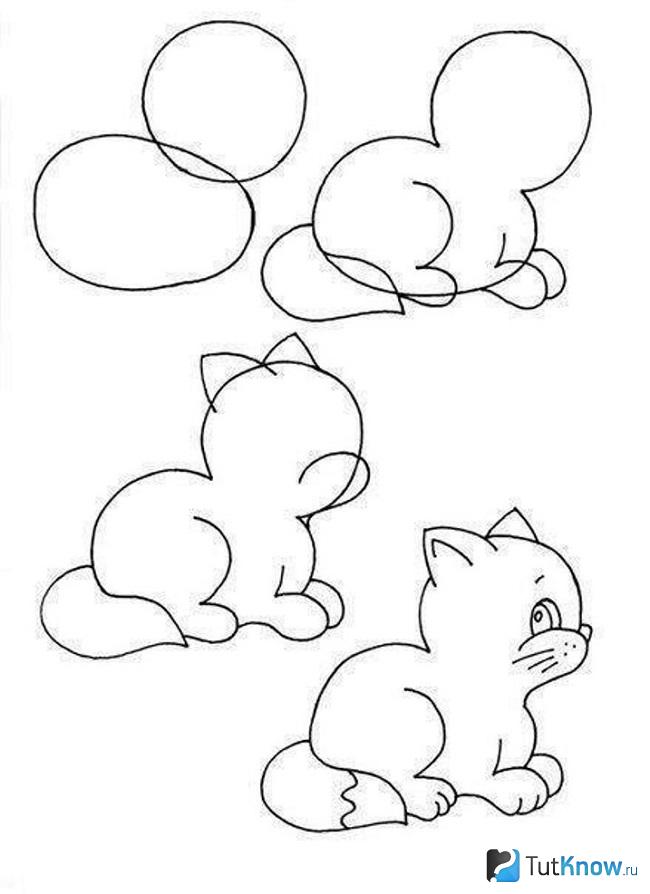
Draw a circle - this is the head blank. It is crossed by the ovoid body. Use an eraser to erase the intersection of these two parts.
Draw the front and hind legs. Also, use an eraser to remove the places where they intersect with the body. Draw a tail.
At the third stage, add ears to the cat, make the muzzle more protruding by drawing an oval at the bottom of the circle.
You already practically know how to draw a cat. All that remains is to erase the auxiliary lines, draw a small triangle inside the right ear, draw the eyes, nose, mustache, toes and the tip of the tail.
Winnie the Pooh
The hero of the cartoon and book of the same name is quite easy to draw.
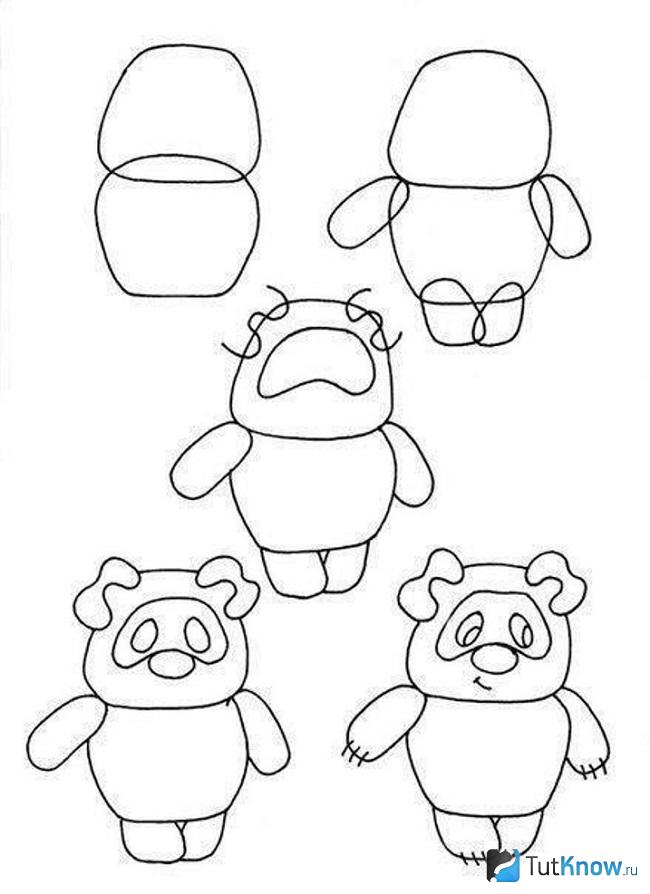
- First, draw 2 identical shapes - they are something between a square and a circle.
- At the next stage, erase the place where they intersect and add front and hind legs to the hero.
- It's time to draw Winnie the Pooh's face and ears. Draw eyes, nose, claws. The mouth, like the cartoon character, is slightly on the side. Which adds charm and originality to it.
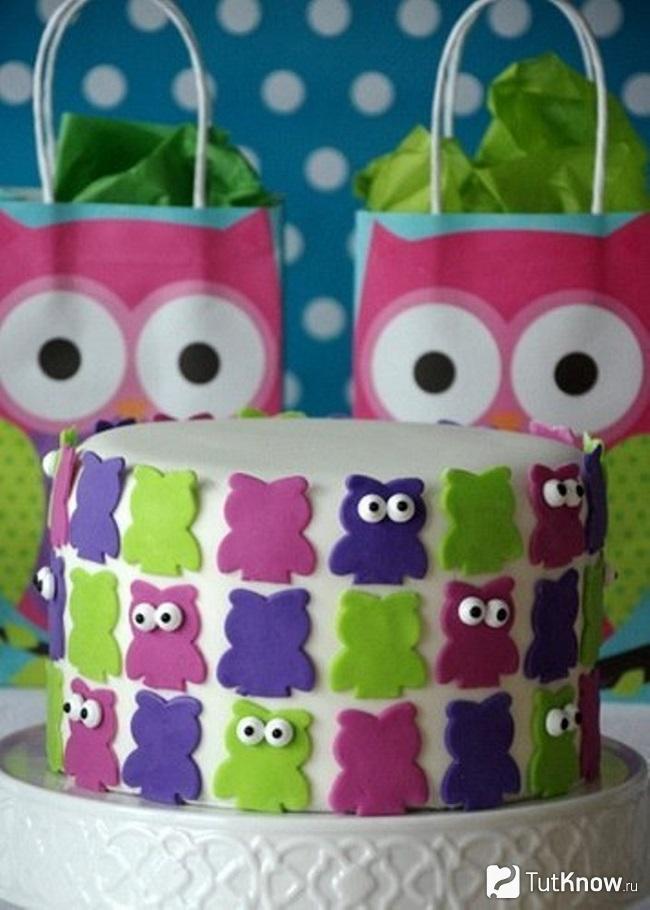
How to decorate a cake with fondant in the form of a design?
To do this, you can use the image of any character that you just learned to draw or depict another character, for example, an owl.
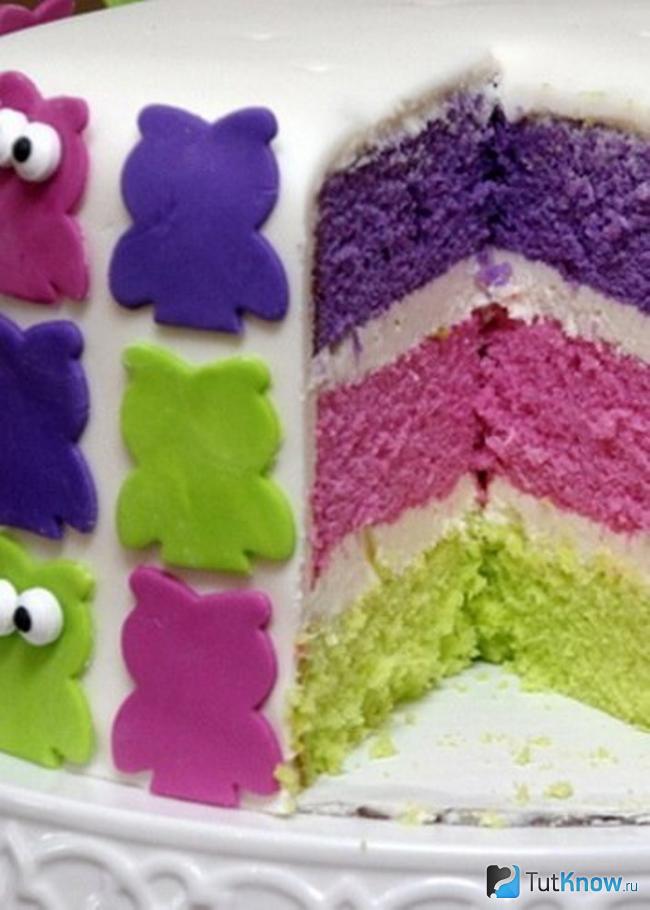
To assemble this cake, take:
- sponge cakes;
- butter, custard or whipped cream;
- white mastic for cake;
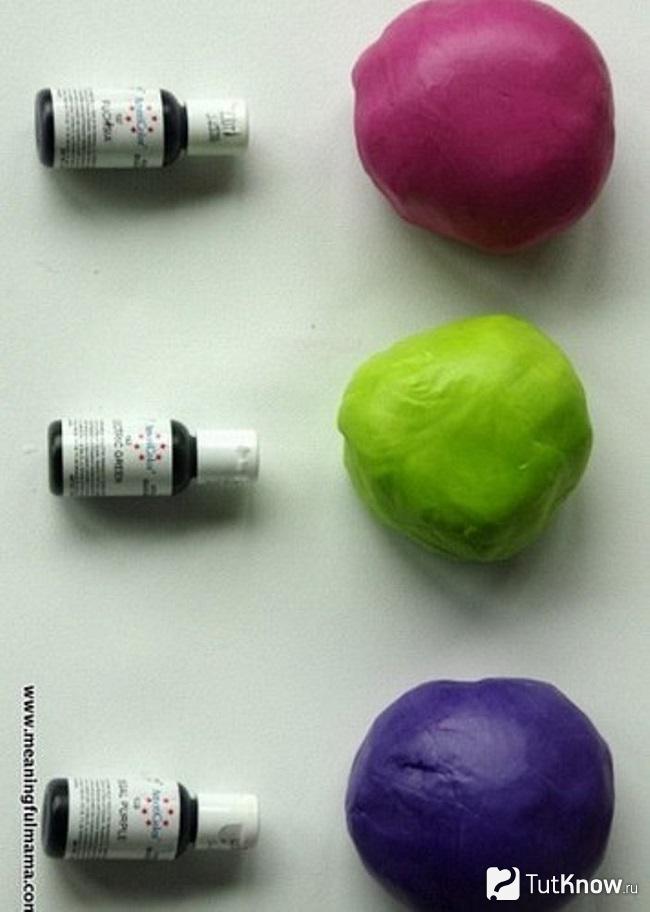
- food colors in three colors;
- black currants or raisins;
- water;
- silicone rolling pin;
You can make your own food coloring using blackcurrant, spinach and beet juice.
The same dyes will be needed to give the desired shade to the mastic. But first you need to assemble the cake. Layer the cakes with cream and place one on top of the other. Place the cake in the refrigerator for an hour, then roll out the white fondant and cover the cake with a sheet of this sweet flexible material.
The fondant will adhere better if you coat the cake with buttercream first.
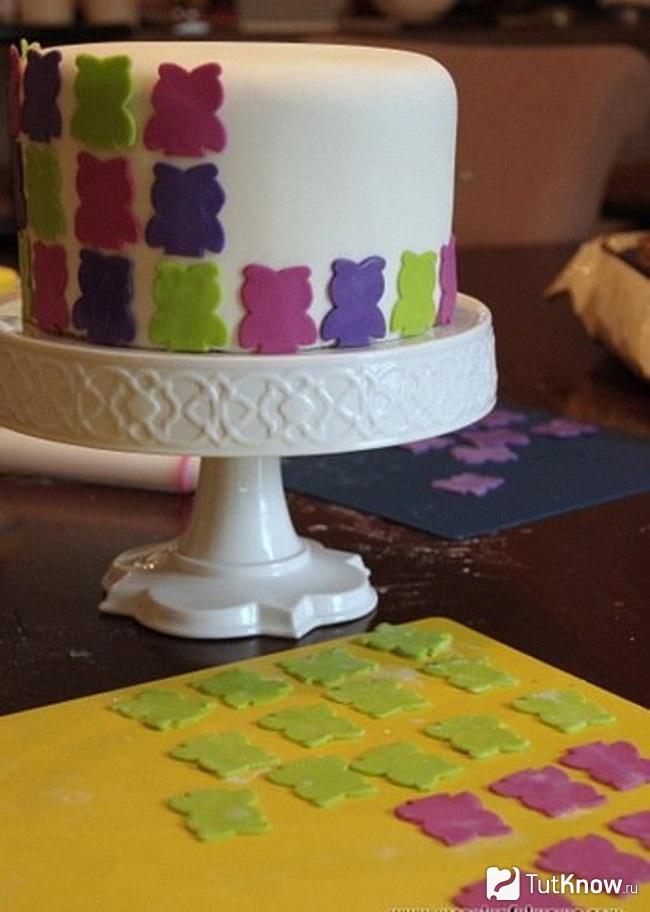
Trim off excess mastic and add more. It needs to be divided into 3 parts, add a little food coloring into each. Roll out the mastic into a layer. Attach a template of an owl or any other character to it, cut it out according to this template.
Dip a pastry brush into water, moisten some of the fondant on the cake, and attach the owl blank here. Glue them all in the same way.
Roll out round eyes from the remaining white mastic. Place a blackcurrant or one raisin in the center of each to make pupils. But first soak the raisins for 20 minutes in warm water until they become soft.
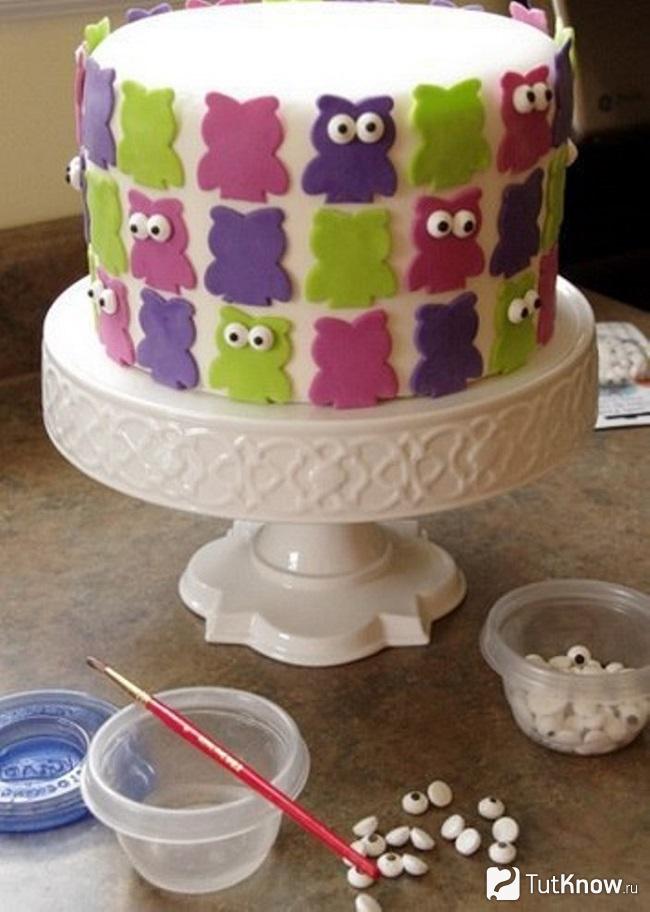
It is not necessary to make eyes on all the blanks; perhaps some owls have their backs turned to the viewer.
Typically, a cake with mastic should be left in a cool place for a day to dry, after which it can be served.
This is how simple drawings will help you decorate a cake. If you want to become the designer of your home, don't forget about accessories. And you don’t have to buy expensive paintings. You can make them yourself, this master class will help you. Such canvases are created very simply, but look impressive.
DIY stone paintings for beginners
To create such a hand-made masterpiece, use:
- smooth stones such as pebbles;
- queen shell;
- artificial moss;
- transparent Titanium glue;
- thin tree branches;
- plywood;
- colored paper;
- paints.
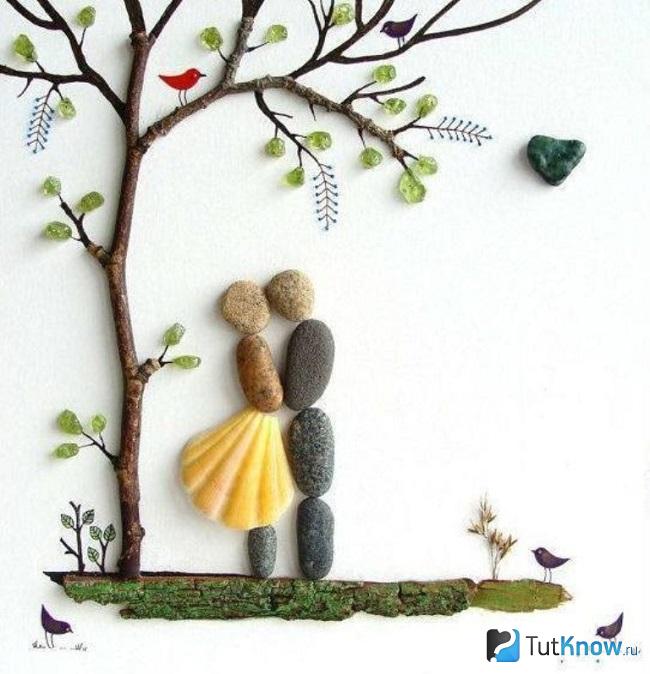
If you are doing this for the first time, then it is better to first mark the locations of the elements with a simple pencil.
Designate where the lovers will be. Glue 3 almost identical flat pebbles to create a guy, and his head using light pebbles.
For the girl’s body, head and legs, use one pebble each; make a “queen” skirt from a shell, after breaking off the “antennae” with pliers.
This picture is perfect for those who are relaxing at the seaside or have brought some shells and smooth pebbles from there from vacation. Such a panel will be a wonderful reminder of a vacation on the seaside.
You can take twigs from a tree growing in your yard, but it is better to use dry ones. Process them with pliers, removing excess.
Attach a relatively straight trunk to a picture of stones with Titan glue. In the same way, glue small twigs that will become tree branches. Cut out the leaves for it from green paper, and the birds from another colored paper.
Complete the elements of wood and plants with paints. Glue the moss as grass, after which you can frame the work and start a new one.
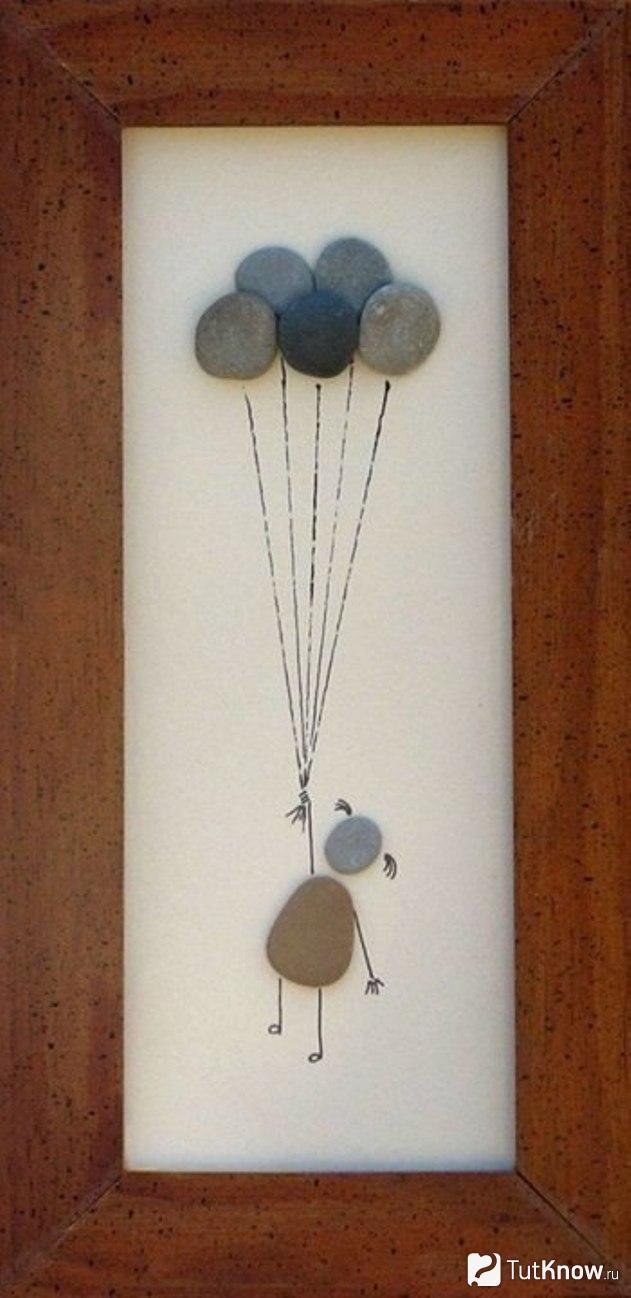
This simple picture is created just as quickly. It will require:
- plywood or thick cardboard;
- frame;
- threads;
- flat stones;
- glue.
girl holding balloons by strings, and they themselves are made of round pebbles.
If you are relaxing by the sea, walking along the beach, look for a heart-shaped stone, you will need it for your next romantic picture.

The oblong pebbles will become the characters' arms and legs, the round ones will become their heads, and the oval ones will become their torsos. Glue a fancy dry branch down the panel - it will become a path on which the lovers stand.
Place a sprig of dried flowers in the guy's hands or make them out of colored paper. Such a picture of stones will be another pleasant reminder of the wonderful summer vacation on the south coast, like the other.

For each cat you will need a pair of pebbles of the same color, but different in size, to make the body and tail. If you cannot find an identical one color scheme, just paint the stones the color you want. When the coating has dried, glue the blanks onto a thick base, having previously painted it or glued a sheet of light cardboard.
Draw the cats ears and grass. Glue twigs that will become a tree and a couple of small pebbles that will turn into birds.

By the way, you can dwell on their creation in more detail. After all, by creating simple drawings step by step, you will also depict birds.
How to paint birds in watercolors?
In just a few minutes you will be able to draw a jay. To do this, take:
- a sheet of thick paper;
- simple pencil;
- watercolor;
- brush.
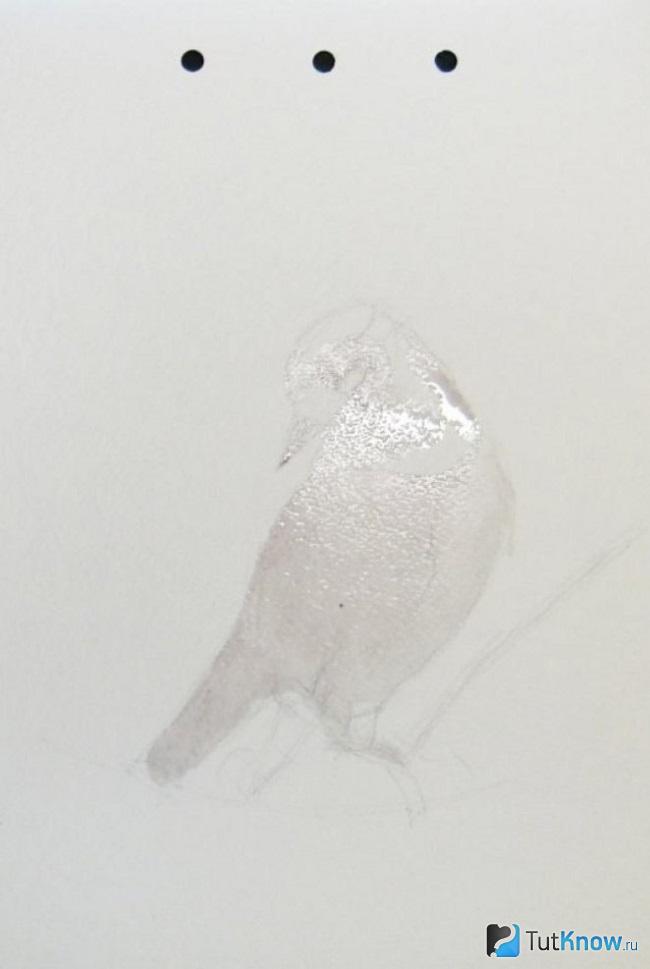
This step-by-step watercolor painting involves using blue and black shades in the second step. Using paint of these colors, highlight the eye, chest, outlines of the jay's back, tail, and head.
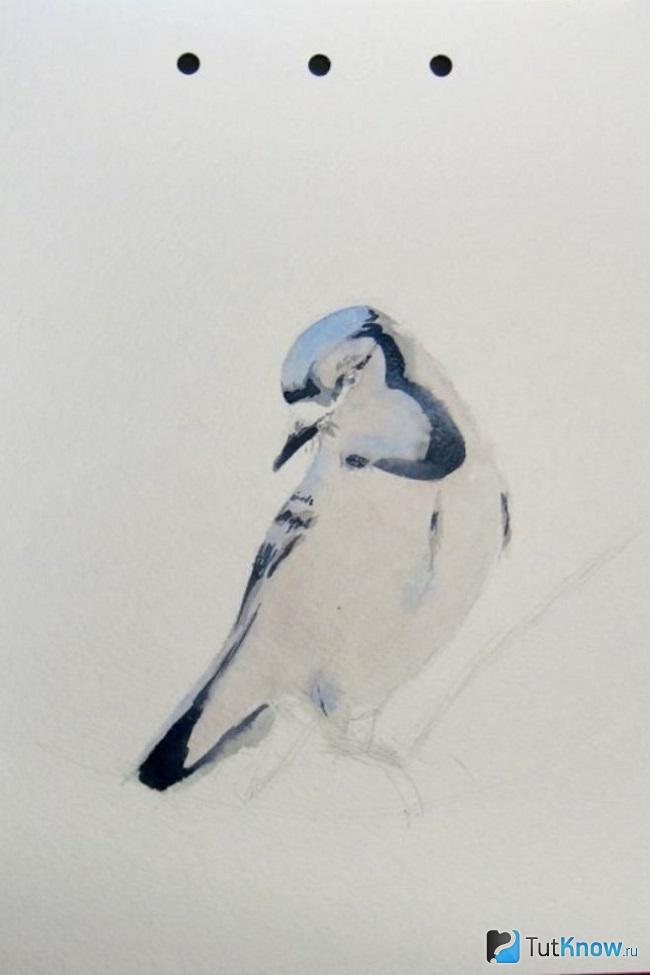
Before this, you need to barely identify these fragments; at the next stage, highlight them more confidently. Use light gray to draw the jay's plumage.
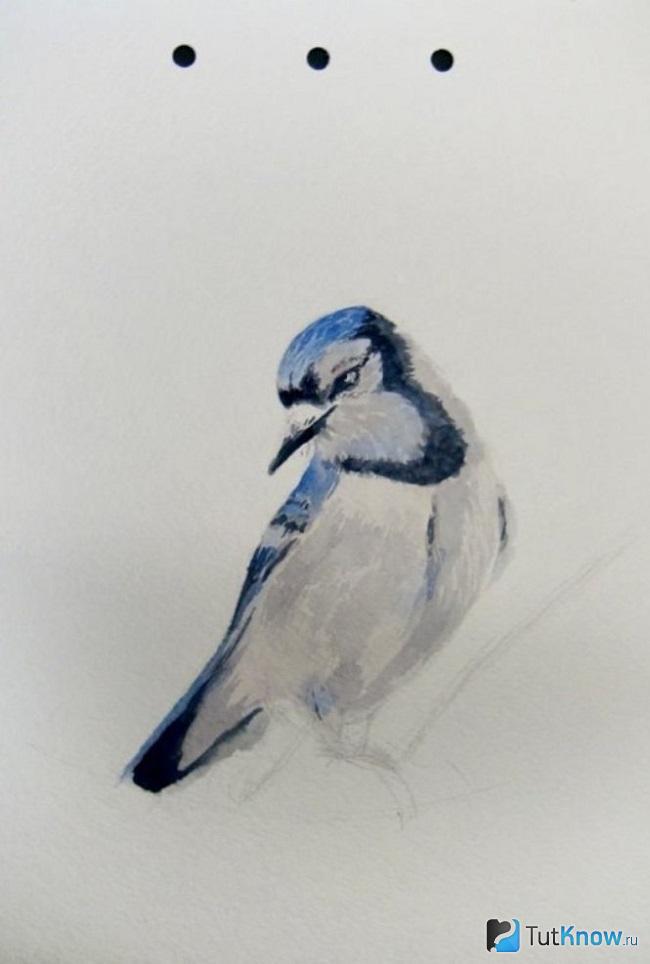
In the next step, act even more confidently, because everything will work out for you! Create a background, let it be green bushes in the background, yellow flowers, sky and a branch on which a bird is sitting.

The last stage is the final one. Make the bird more realistic by doing a few strokes of black and gray paint on its chest, side, and head. Highlight the background by adding green and yellow watercolors. You can also draw a blue sky behind the jay.
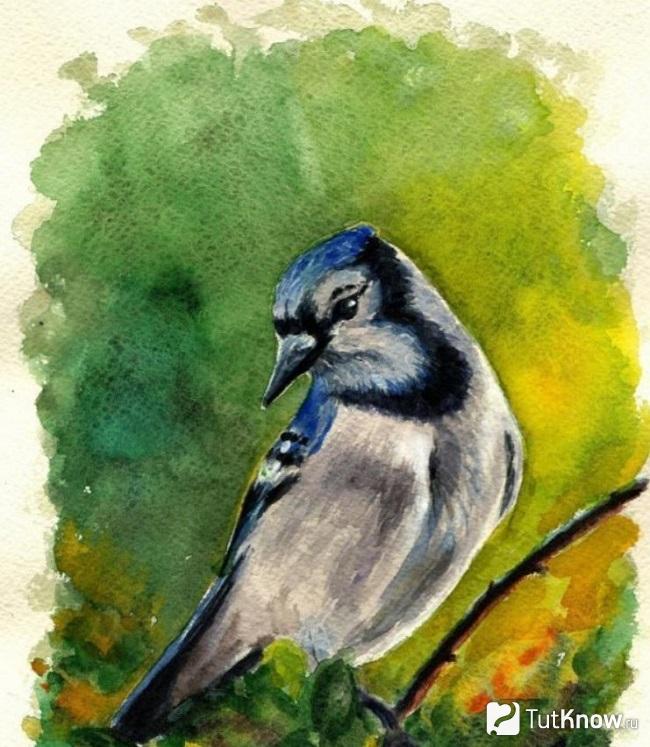
Here's how to paint with watercolors step by step. Now you can create simple canvases with a simple pencil, paint, and even using stones. Create, dare, and you will certainly succeed!
How to draw simple drawings for beginners, see here:

Popular
- Useful properties of Vaseline that you didn’t know about What is Vaseline and why is it needed?
- The right choice of hand cream against cracks and dryness
- How to prepare facial milk at home and use it correctly?
- Crochet toys with descriptions and patterns for beginners, patterns, professional amigurumi knitting
- Calculation of old age pension, or counting your pension yourself
- How I brought my husband back to the family
- DIY hairstyles for shoulder-length hair
- Uterine tone during pregnancy: symptoms, increased cervical tone Prevention of uterine hypertonicity
- Fashionable New Year's hairstyles for girls
- How to sew a hair tie (detailed master class) Do-it-yourself elegant hair bands