DIY gnome costumes for the New Year. DIY gnome costume options. How does a gnome dress?
Top. White (blue, yellow, pink, etc.) shirt. On top is a long checkered vest without a fastener, which can be sewn from an old blanket (Fig. 1).
Belt with a big beautiful buckle. Instead, you can attach a large mother’s brooch to your belt or make a buckle yourself. To do this, cover the base cut out of cardboard with foil (it is better to take foil from cigarette packs - it is paper-based and will stick to the cardboard better). Beads, shiny buttons, sequins or rhinestones can then be glued or sewn onto the buckle. Place a large button or rhinestone in the center. You can apply a drawing with a marker (Fig. 2).
Bottom. Pants - just below the knee, wide, plain, preferably made of fairly dense material (colors - blue, red, green, brown, but so that the pants match the color of the vest, cap, knee socks).
On my feet. Knee socks bright color, striped or plain, and shoes (low shoes) decorated with buckles, which can be the same as on the belt, but a little more simply decorated.
On the head. The cap is red, blue, green. It can be sewn or made from old leggings, the sleeves of a knitted sweater or a flannelette sweatshirt (T-shirt). The cap is slightly gathered at the bottom; a weak elastic band can be inserted there (Fig. 3). Pompom - made of threads. The beard and hair protruding from under the cap are artificial (see the chapter “Making wigs...”). The hair is sewn directly to the cap, and the beard is put on with an elastic band.
Makeup. You can add a slight blush to your face with lipstick and even lightly “smear” your nose.
Props. In the hands of the Dwarf is a wand with a knot. Any twig, previously cleared of various jagged edges, or a stick will be suitable for this purpose. A bundle of light cloth with a small pattern is hung on it. Fill the knot with cotton wool, foam rubber or crumpled newspapers.


When New Year or another holiday approaches, when children love
change clothes, all of us, parents, think about a carnival costume for our kids. Of course, today stores offer a huge selection of clothes for such occasions. However, it will be much more interesting and exciting to make a costume yourself with the help of a child.
Invite your child to become a magical gnome for the holidays; he is unlikely to refuse! Moreover, it is not at all difficult to bring such an idea to life.
First, let's figure out what components a gnome should consist of. Usually these are depicted dressed in short pants, a vest, a cap, and knee socks. In addition, you should wear any shirt untucked. I think every boy has this item in his wardrobe. But you will have to work hard on the remaining elements.
First we'll make the pants. Look in your boy's closet. Surely there will be old trousers there that will become ideal option in order to make a gnome costume. The main thing is that the top fits comfortably and does not restrict movement. First of all, to a length just below

Knee. We measure the circumference of the child's leg at the end of the legs, add a couple of centimeters and cut out the cuffs of the resulting length and sew them on.
Let's start sewing the vest. If the pants shortened at the previous stage are wide enough, then you can cut out the upper part of the suit from the cut-off flaps. Otherwise, you will have to choose a suitable fabric. It’s even easier to make a vest from an old jacket or sweater. When cutting, keep in mind that this element of the costume should be quite short. The edges can be processed. The vest included in the gnome carnival costume does not fasten, but you can sew strings with pom-poms along the bottom. To make them, we cut out a circle, stitch along the edge, insert synthetic padding and tighten it. By the way, the same pompom will be useful for a cap.
The gnome's headdress and knee socks can be made from any knitwear in two colors. Can

Take your mother's old dress or your father's thick T-shirt. The cap is cut in the shape of a triangle and sewn on both sides. A cuff made of contrasting fabric is sewn along the bottom. You can also attach artificial curls to it. Attach a pompom to the tip of the cap.
A gnome's costume would be incomplete without socks. To make them, we cut strips of contrasting colors. It is desirable that they be the same width. We combine them, alternating. We measure the circumference of your child's legs in several places and cut the socks so that they can be easily put on, but so that they do not dangle. If the fabric is elastic enough, you will definitely achieve this.
To make the look more impressive, it is advisable to complement the gnome costume with a belt with a buckle. You can decorate your baby's shoes with similar accessories. In addition, it would be nice to hand a wand with a knot into the hands of a newly made gnome. To make this prop, take any branch and carefully sand it to avoid possible splinters. The knot is sewn from any scrap into a small pattern and stuffed with foam rubber or newspapers.
The final touch is to take red lipstick and draw the cheeks and nose. Well, you can admire the fruit of your efforts, the gnome costume is ready!
What children's party takes place without carnival costumes and fairy-tale characters? And especially memorable are those moments when the baby himself becomes a participant in the holiday. The transformation of children into heroes of popular fairy tales begins as early as kindergarten, even then, teachers give out small roles to their students and puzzle parents with purchasing costumes and accessories for the upcoming event.
Boys are often dressed in the costume of a gnome, a bunny, a bear or a brave musketeer. Preparing for an upcoming event is a very responsible task for both the performer leading role, and for his mom and dad. Parents, of course, will want to capture their son in a photo or video. Afterwards it will be carefully stored for many years, recalling the bright magical holiday childhood. If your child has the role of a gnome, you need to carefully prepare for it.
Fairytale costume
It would seem that finding a gnome costume for a boy is one of the simplest tasks; you just have to go to the store and buy it, or perhaps rent it at a salon. But in reality, everything is not so simple.
The choice of suits is really great - for every taste and color, but the price for such clothes will be, to put it mildly, “fabulous”. Buying your child an expensive gnome costume is not the best solution, because he will only wear it once, and next year the suit will already be too small for him, children are growing up quickly.
You can, of course, try to choose a cheaper outfit, but often the appearance of such suits is depressing. The material used for them is of the lowest quality, they are sewn haphazardly, and thanks to the flashy poisonous colors and appearance often vaguely resemble a character from a fairy tale.
Of course, everyone wants their child to stand out from others. But where is the guarantee that the parents of classmates will not buy their son exactly such an outfit? This is probably why most mothers have the idea of why not try to sew a gnome costume with their own hands. Is it difficult? Let's answer this question together.
How does a gnome dress?
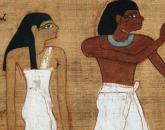
A gnome is a gray-haired old man with a long beard who lives in the forest or mountain caves. Dwarfs work mainly as miners - they extract underground treasures and carefully protect them from prying eyes. They are constantly at work, so their decoration is not particularly rich. The little old man dresses simply and comfortably: a shirt with a vest, short pants or shorts with suspenders, ankle socks, and a wide belt with a beautiful buckle on his belt.

The main attributes of a real gnome are a cap on his head and a thick gray beard. The gnome's shoes are also simple - ordinary leather boots or shoes with toes turned up. As you can see, there are no complex elements in the wardrobe of a fairy-tale hero, so sewing a gnome costume with your own hands will not be difficult.
What can a suit be made from?
Before you go fabric shopping, take a look at your wardrobe. Surely you have things that you don’t wear, but their quality is quite acceptable. Your son will probably have some clothes that he has outgrown, all you have to do is alter them a little, add some additions - and you will have an excellent gnome costume.
The color scheme can be completely different, but usually gnomes prefer green, brown or yellow flowers. The gnome's cap is long, with a pompom at the end. In his hands, an old man can carry a traveling bundle with provisions tied to a long stick.

In our article you will find several different ideas on how to dress up a boy. Perhaps you will be led to interesting ideas our photos. Any mother, even one who has never encountered sewing before, can easily make a gnome costume for her son.
Shirt and socks
The shirt should be plain or just white. You will have to buy golf socks; they are either white or with stripes. But if you decide to dress the boy in long pants, then you may not need them; ordinary socks will do just fine.
Vest and belt
The vest can be easily sewn from any thick fabric. You don't need any special pattern. Take your boy's T-shirt, fold it in half lengthwise, attach it to a piece of paper and draw an outline with a pencil. You don't need sleeves. A gnome costume can be with a short vest or, on the contrary, with a long vest. This one will be belted on top with a belt. The floors can be slightly rounded in front, your pattern is ready. Now all that remains is to sew the parts together. If desired, you can decorate the edges of the vest with pieces of faux fur or a strand of cotton wool.

You can use the old one leather belt from your wardrobe, cut it to size and make a beautiful buckle for it. It can be cut out of a thick piece of cardboard, wrapped with foil or any fabric on top, and decorated with beautiful stones or beads. Perhaps there is a large beautiful brooch in your house?
Pants or shorts
Your child's pants, which are already too small, will be perfect. You can tuck them a little more at the bottom and decorate the sides with bows. Many gnomes have suspenders in their wardrobe, if you have them at home, feel free to use them for a suit.
Cap and beard
A boy's gnome costume must have an important element - a cap. You can easily sew it yourself. Measure the circumference of your child's head and the desired length of the cap. Transfer to fabric, cut and sew. You can sew in an elastic band - this will help keep the cap on your head better. Don't forget to make a pompom - it is an important element of the hat. If desired, you can decorate the cap with faux fur or cotton wool.

The beard can be made from cotton wool or knitted from white threads with beautiful air loops. Secure it with an elastic band or sew it to the cap.
Shoes
Use regular shoes that your child wears. They just need to be decorated with a beautiful buckle, the same shape as on the belt. The trick is simple - cut it out of cardboard, cover it with foil and decorate it.
If you put in just a little time, effort and ingenuity, your boy will turn out to be an excellent fairy-tale gnome. The New Year's costume can be embroidered with Christmas tree rain, snowflakes and a little sparkle. Frost can lightly touch the nose and cheeks of a fairy-tale hero and leave a light blush on them (with the help of mom’s blush, of course).
As you can see, making a suit for a boy with your own hands is not at all difficult and does not require any special expenses. There is another big plus in this - your outfit will be one and only, original and unique of its kind. You and your child will definitely remember this one. Happy and fabulous holidays to you!
The need for the child to participate in New Year's party, being dressed in a carnival costume, poses the task of choosing a suitable image for parents. One of the most popular is the gnome costume. It is known to us from many fairy tales, in each of which these creatures had their own characteristics.
What should a gnome's outfit consist of?
Possessing great experience In sewing, parents can independently make each element of such a costume. But what about those whose skills in this area are limited or when there is not enough free time? How to make a gnome costume without spending a lot of time and effort on it?
You can use a single-color shirt as the basis for the top of the outfit. At the same time, its bright shade is important. Almost any existing pants will work for the bottom. In this case, creating the basis of the image will not require labor.
Most important elements The gnome's outfit consists of additional items: a vest, a belt with a massive buckle, a stick with a knot and a cap with a characteristic bend.
In some cases, they use mittens, a false nose and makeup, as well as cardboard buckles on shoes.

How to sew a vest?
This part of the suit should be a different color from the shirt. Unlike the latter, the vest can be made from fabric of different shades, for example, checkered.
To make this item you will need:
textile ;
sewing machine;
threads to match the fabric;
paper;
marker.
At the first stage, you should make patterns. They can be made by tracing any of your son’s T-shirts on paper. It must be remembered that the vest is more open in the front and should be shorter than the shirt. Therefore, you need to make appropriate adjustments to the drawing. Taking them into account, the fabric is cut.
Using a machine, you need to carefully sew the parts of the vest, and also make neat folds of the fabric along its edges. After this, the vest will be ready.

Sewing a cap
The cap should also be bright. It will ideally match the color of the shirt. When making a headdress, it is important that its lower part matches the size of the boy’s head. Therefore, you need to measure this parameter using a centimeter.
The pattern should be made on the basis of a drawing, the lower part of which is 2-3 cm larger than the above value. This reserve is taken for the future seam. The upper part of the drawing represents a single vertex, to which there are two lines converging from the base.
Using a machine, a neat seam is made, after which all that remains is to bend the cap, filling its top with cotton wool or padding polyester.

Creating Other Elements
The gnome's belt is made using a fabric belt and a dummy large buckle glued to it, which can be cut out of cardboard. The same elements can decorate shoes.
An important part of the outfit is a stick with a knot. It is made simply: using a short wooden handle. The bundle itself should be stuffed with light, soft material.
If the pants you use will be short, it is advisable to wear striped socks.
Self-created carnival costume a gnome is not an impossible task. With the proper degree of perseverance, the result can greatly please the boy and the whole family.
Created 12/28/2017
Children's New Year's Eve parties are not complete without costumes of fairy-tale characters. Not everyone can afford to buy a suit. Moreover, the child is growing quickly and this will most likely only be an outfit for one time.
If you have a sewing machine and at least some basic sewing skills, you can sew New Year's suit with your own hands. It’s not even necessary to buy new fabric and other finishing materials for this. We offer the idea of gnome costumes for boys from what may be gathering dust in closets without use. They are not sewn according to all the rules of “cutting and sewing,” so this is by no means a training material, but only an example of how every inexperienced seamstress can make a New Year’s costume for her child.
The first version of a gnome costume for a boy
Sweater
To make a pattern, you can use a child’s item as a basis. For example, a turtleneck. We add a few centimeters on the sides, depending on how wide we want to make the jacket. Set aside the desired length. We make a round neckline. Not very deep, but enough for a head to fit through. We draw the armholes as in the photo.

The pattern of the collar and parts that are sewn to the armholes are also shown here.
Sew the shoulder and side seams. Here, for stitching details to the armholes, faux fur was used on the front side and knitwear on the back. We fold the fur and knitwear face to face and sew along one long and two side sides. We turn it right side out and stitch along the edge, placing the piece with the knitwear facing up, watching the fur pile and straightening it if necessary. We sew the finished parts with the armholes and sew them together. The edges of the strip should meet at the side seam.


The collar also consists of fur on the front and knitwear on the back. We sew the parts together, leaving the side unstitched where the collar will be sewn to the neck. Turn it right side out, stitch along the edge, placing the piece fur side down. We sew in the collar. We cut out a strip from the same knitwear and use it to trim the bottom.

Since jersey is used to finish the bottom edge, it can be cut in a straight line. If you take non-stretch fabric, you will need to cut it on the bias.
We make pompoms from black fur: two for the jacket and one for the cap. To do this we draw circles. It is convenient to use a cream jar or a small glass and circle it with a sharpened piece of soap. It is better to cut circles with a sharp blade.

Pinch off equal pieces of cotton wool. They should not be too large, but such that the pompom is softly stuffed and the cotton wool allows the edges to be sewn together without much tension. Using small stitches, we manually pass along the edge of the circle, insert cotton wool and tighten the thread. Make a few more stitches to secure the edges together. Leave the needles and threads on the pompoms.


We sew them to the jacket. It is better to do this together with small buttons on the wrong side. And it looks neater, and the fabric won’t tear.


Instead of fur pompoms, you can sew large wooden buttons. Replace the fur on the collar and armholes with wool or felt, and at the end of the cap make a tassel from the same material cut into thin strips.
Trousers
Using some of the child’s pants, we make such a pattern.

Cut out 2 pieces and place them together with right sides facing inward. Sew the middle seams and then the crotch seam. We cut out a strip for the belt from knitwear (here black stretch velvet). Its length should be less than the circumference of the top of the trousers. We will insert an elastic band, therefore, having measured its width, multiply the resulting number by 2 and add 2 cm to the seam - we get the width of the strip. We sew the edges of this part together, fold it in half along the length and attach it to the top of the pants with a slight tension, laying a line 1 cm from the edge. Leave an unstitched gap. We insert the elastic, sew its ends, hide it inside and stitch the seam to the end. The elastic inside should fit evenly, so it is important to correctly calculate the width of the strip. As a result, wide pants gather gently at the waist. We also make cuffs at the bottom, but we cut the rectangles wider and do not insert elastic.

Cap
We measure the circumference of the head and determine the length of the cap.
Here the circumference is 50 cm and the length of the cap is 45 cm.

Fold the fabric in half with the right side facing inward. Along the fold we set aside the length of the cap and put marks (in the photo “a” and “b”). From point “a” we draw a perpendicular line about 3 cm long (point “c” in the photo). From point “b” we draw a perpendicular line and set aside half the circumference of the head, plus 2 cm for a loose fit, plus 1 cm for a seam allowance, plus 3 cm. From point “c” we draw a line equal to the length of the cap (point “d”) . We connect point “b” to point “d” with a smooth arcuate line. Cut it out. It is better to immediately check on the child’s head to see if the part is too wide or narrow. If everything is correct, place it on the fabric with right sides together, trace it and cut it out. For the inside of the cap, blue jersey is used here. It is softer, thinner and more pleasant.
The gnome's cap will hold its shape slightly. To do this, we use this kind of zig-zag cotton wool. It unwinds from the roll in a thin strip, which is very convenient.


We lay out the strips of cotton wool slightly overlapping. Place the outer part of the cap and baste it. We sew close to the edge along the perimeter. Cut off the cotton along the edges.


Place the inner piece face up on the side with the cotton wool and sweep it off. We sew close to the edge along the entire perimeter and immediately begin to stitch with straight lines (perpendicular to the bottom of the cap) at an equal distance from each other. We don’t interrupt the line: we finish stitching to the edge, turn it, sew the required distance along the side and again straight line down, and so on. You need to stitch along the front part. The fabric will bunch up a little, no big deal, you just need to make sure it’s evenly distributed.


Fold the cap right side inward and sew the side seam and the top 0.5 mm from the edge. Turn it inside out and straighten the tip. Take the pompom and sew it to the top so that it holds tightly.

From knitwear we cut out a strip 3 cm longer than the circumference of the bottom of the cap. We measure the width of the elastic, multiply by two and add 2 cm to the seam - this is the width of the strip.

We sew together the edges of this facing from the wrong side. Fold in half and attach to the cap, placing a strip on front side. When sewing, you need to stretch the cap a little, because the strip is longer. Thanks to this, the cap will fit your head, holding it tightly, and loosely on your forehead, without pressing your ears.

The figure shows the simplest option.

We cut out one piece from wool (we determine the length by the circumference of the abdomen, adding a few centimeters to the free end), make a hole according to the mark, insert the buckle tongue, turn the end inside out and fasten it. We sew the edges of the loop, turn it inside out and put it on the strap. The tip can be made straight. It is better to take a plastic buckle, as it is lighter and the strap will not sag.
Shoes
This is the pattern for them.

- foot width
- foot length
- circumference of the foot at the highest point divided by 2
- ankle circumference divided by 2
The circumference of the foot is measured as follows: place your foot on the floor and use a measuring tape to measure (with an arc along the leg) from the floor on one side to the floor on the other.
We add a few centimeters to the resulting measurements, because the gnome’s shoes are voluminous. The tongue, toe of the shoe and tip of the sole are modeled freely. For the base of the sole, you can place a child’s shoe on a sheet of paper and trace it. An error was made here and the width of the tongue was not taken into account. That's why the shoes turned out to be huge.
When constructing the side part, divide the width of the tongue by 2 and subtract the resulting result from lines 3 and 4.
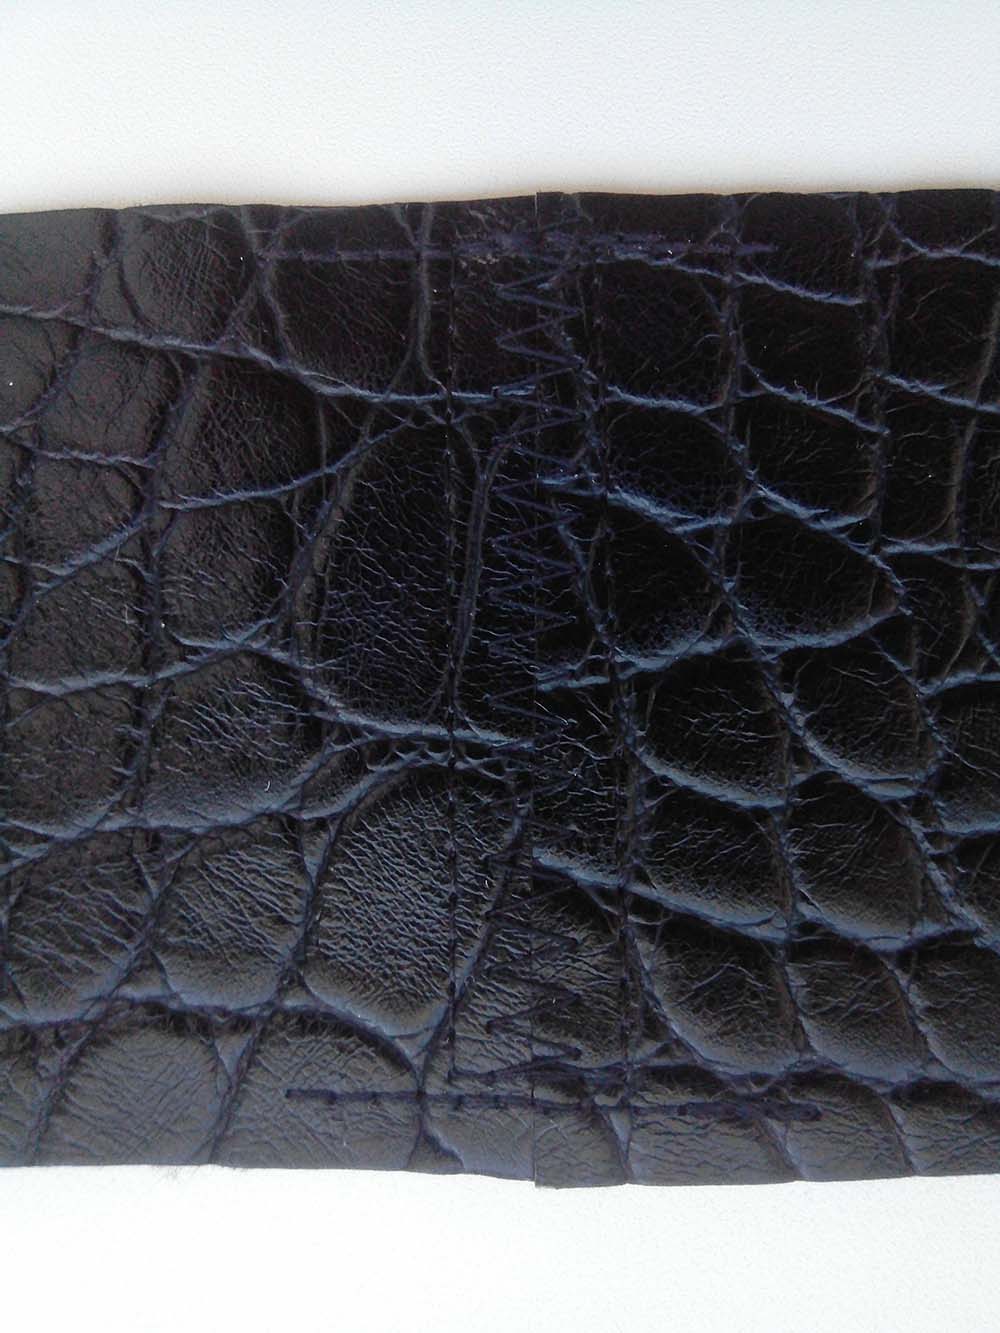
The material used was artificial leather, and the seal was a yoga mat. You can take wool or felt. And to add volume - cotton wool. Or do without a gasket altogether.


We cut out the details. If the material allows, we make the sidewalls one-piece; if not, the upper part is cut out separately.
Sew the sides together. To strengthen it, non-woven interlining is used (without ironing), and the edges are ground with a zigzag.

In the same way, we sew the halves of the lapels if the parts are not one-piece.

Sew the top parts to the main ones.


We apply the second parts of the top, sew and zigzag along the sides and top sides.


Then you can stitch along the face again with a thread of a contrasting color.

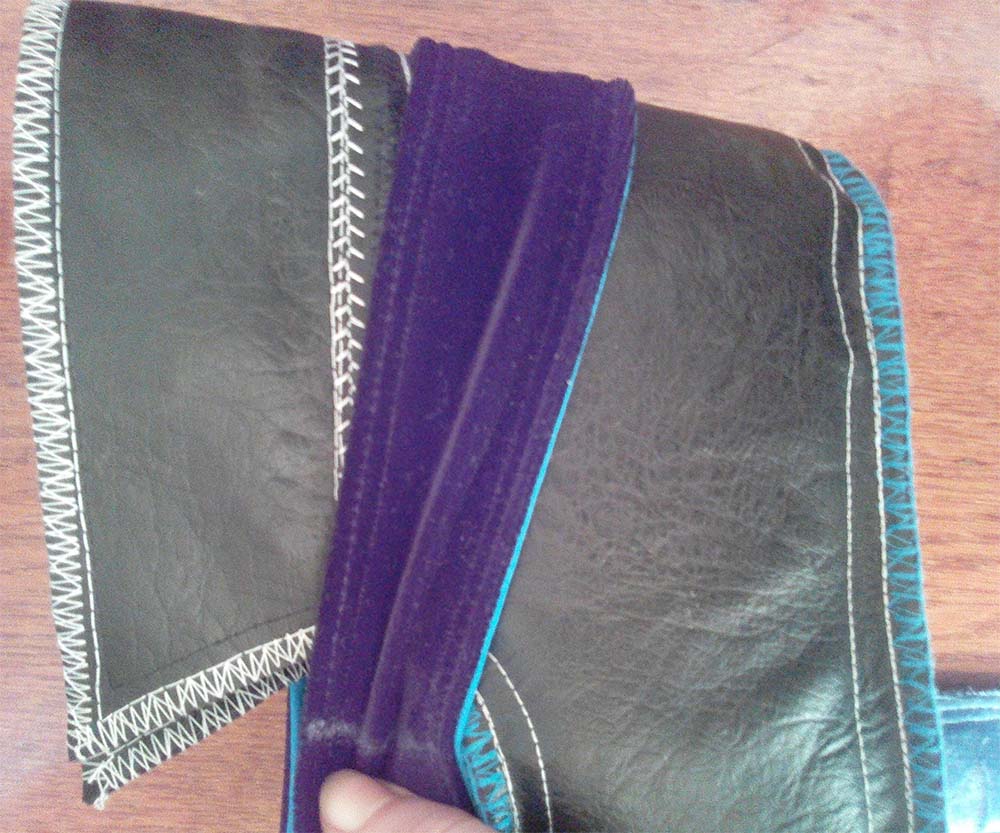
We place the assembled front part on the fabric (here stretch velvet) and trace it along the contour, excluding the top.

We make an allowance as in the photo. You need 2 of these parts.

Sew on the lining as shown in the photo.

The sealing material was glued with Moment Crystal transparent glue. It must be applied to the entire surface in a very thin layer. First on one side and attach to the part from artificial leather, then on the other side, apply a velvet piece. Press down, for example, with a stack of books. However, you can skip this step. Moreover, then the skin comes off in some places, so this method is not very good. And the glue can even seep through the fabric and you get a hard stain.


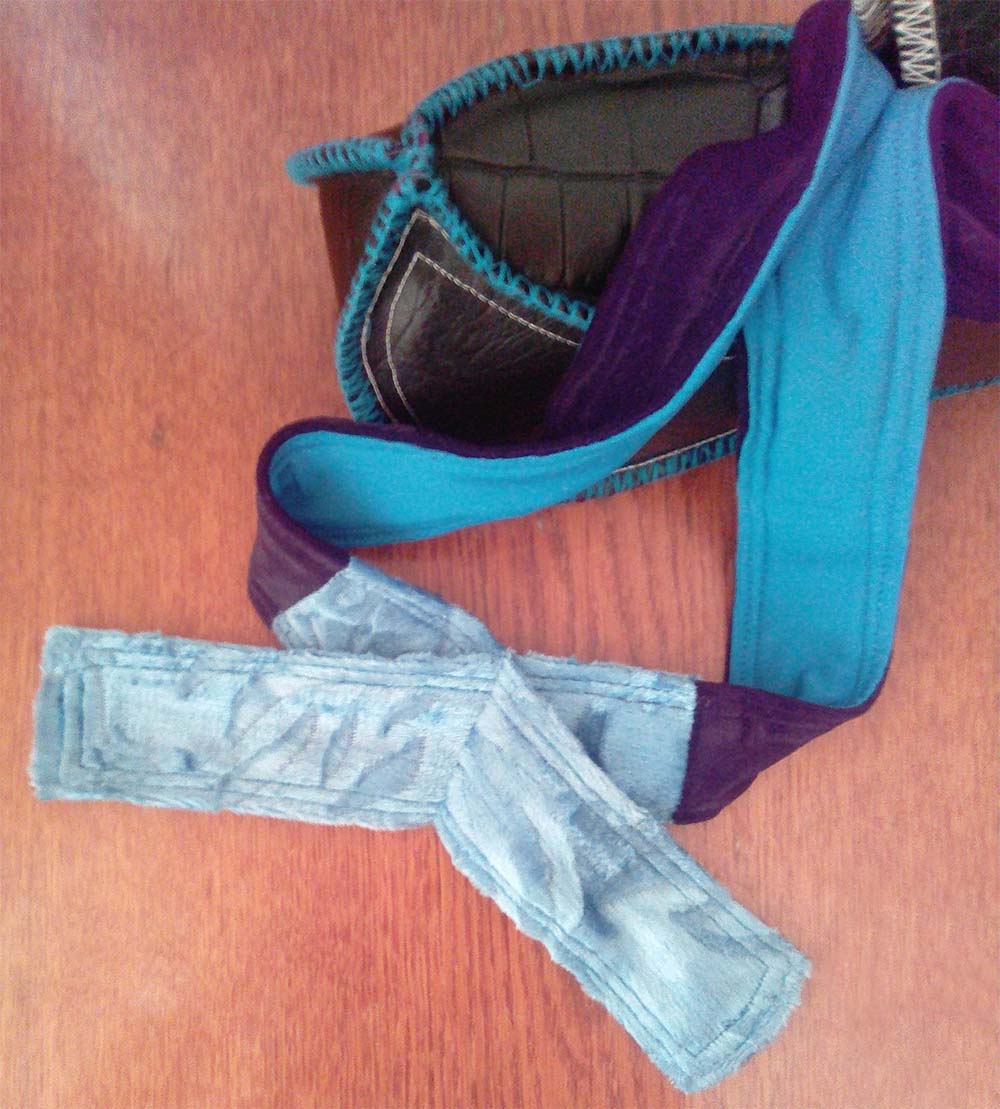
For the bow we sew a strip.

For the sole and tongues, we also cut out paired parts and assemble everything together.

In the middle of the main part we sew a strip for a bow.

We sew the sole to the main part manually using a blanket stitch. We start from the spout, stepping back slightly from the edge. We also finish the seam a little short of reaching the end.


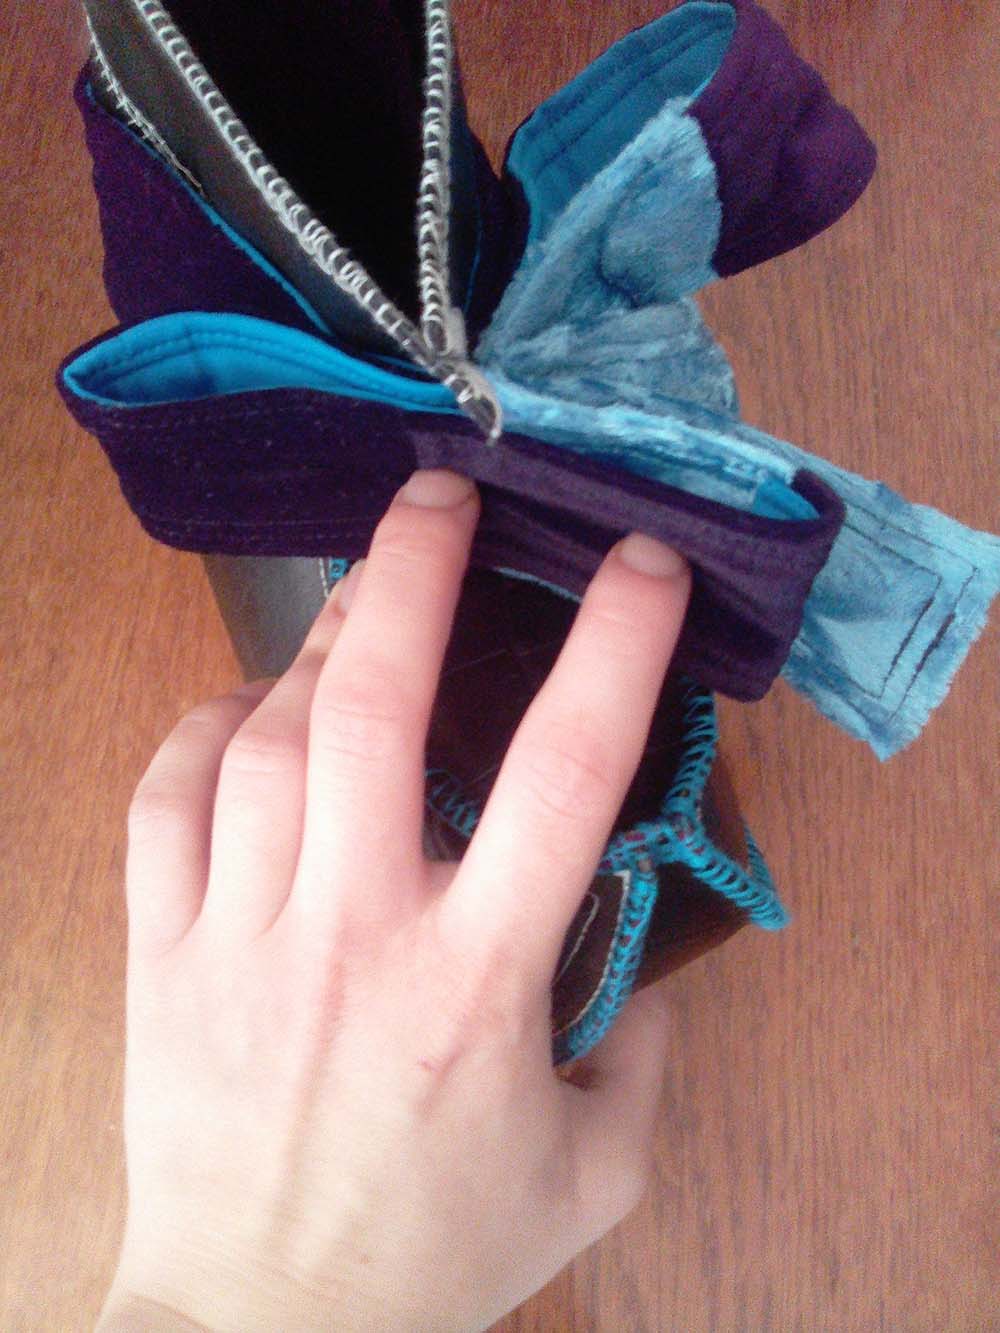
Sew on the tongue. Mark the middle point on it, align it with the nose and start sewing.


Pull the strip for the bow a little and mark the line where to sew. Remove from the shoe and stitch along the mark.


We form a bow, determining the length of its ends.

We scribble diagonally.

Now you need to sew the middle together - seam to seam.


The bow turned out too big and falling down.
Tip: To accurately determine the length of the strip you need to sew, use a measuring tape. Tie it on your shoe with a bow and see how many centimeters it takes.


Let's make it like this: put the parts together as in the photo and sew them together.


Of course, the bow was too tricky. It could be easier. For example, make it separately by sewing a rectangle, lightly stuffing it with cotton wool and gathering it in the middle. Then sew to the shoe. If you use felt or wool for the shoe, you can pull it up along the leg using an elastic band, and for a bow, a wide ribbon or a buckle is quite suitable.
We pull the bow tightly in the middle with a piece of elastic and sew the ends together.


Sew the bow to the top of the tongue, stepping back a little from the edge.


We make 2 pom-poms and sew one on each spout so that they “sit” firmly in place.


This is how the gnome's shoes turn out.


And the general image.

The second version of the gnome costume for a boy
Since the costumes are for brothers, it was decided that they would not differ much. The main fabric is the same (it's an old curtain, by the way). Only a different color is used for finishing. And other shoes.
Blouse
We take something as a basis. Here is a jumpsuit, and since it is tight-fitting and already small, we add quite a lot (the fold is on top of the fabric). Sew on the sides.

From the knitwear we cut out a strip around the circumference of the sweater, sew the ends together and iron the edges towards the middle.

Baste to the edge of the sweater, then stitch close to the edge. It is important here that the seam runs smoothly from the face and back and does not go beyond the edge. You can put a decorative stitch on top.


The neck can be made deep enough for your head to fit through freely. Otherwise, you need to make a fastener. To do this, make a perpendicular cut in the middle of the back part (or front part).

The facing would be more careful here, but if there is not enough fabric, we will also trim the neckline with a strip of knitwear. We adjust it from the inside out to the end of the cut.


Sew the edges and finish the stitching.


Now we make a buttonhole. We fold the thread in several layers, thread it through a needle, tie a knot, pierce the facing on the coal from the inside out, bringing it out.

We crochet a chain of air loops of the required length.


Now we insert the needle inside. Make a couple of stitches near the base of the loop, fasten and cut the thread. We fold the edging, baste, stitch.


It is also finished with decorative stitching.
Iron, pressing the curve at the bottom of the cut. Sew on the button. The clasp is in the shape of a drop.


We cut out 2 parts from the same jersey (their length is calculated according to the circumference of the place on the sleeve where we will sew) for the drawstring on the sleeves. Iron the edges towards the middle.

We tuck the ends and it is more convenient to sew them manually.

To tie, take a thin ribbon, cut it to the required length and string a bead onto one end, securing it with a knot at the bottom.

Sew on the drawstring, moving away from the edge of the sleeve. We thread the ribbon. We string the second bead. We tie a bow.


Panties
We cut out along the bottom of the child’s overalls. Add as much as necessary.


Sew the middle (back and front) seams, then the step seam.

Iron the edges.


Since the pants are wide and need to be seated on the stomach, we make a fold or tucks on the sides. You can make them with an elastic band. But then, when cutting, do not forget to add on the hem.


Here a fairly wide strip of knitwear is used, which is shorter in length. The elastic was not inserted inside. The strip is cut out to such a length that it fits tightly around the stomach, but does not press.

Hem the edges of the trousers. At some distance from the bottom, we sew a drawstring and insert a ribbon with beads at the ends. We tie bows.

Vest
We cut it like this.


All parts are sewn with an overlay seam, so we make allowances of 0.5 cm, and on the sides and shoulders - 1 cm. There is no need to make allowances along the armhole, neckline, bottom and on the opposite edges of the front. But if you sew from wool or felt. Bulk material will need to be processed.
It is convenient to mark the seam line and apply the part along it. We sew on the front side.


First we assemble the back and front, then we sew along the sides and shoulders.


You can beautifully stitch it with a contrasting thread, for example, in the color of the main fabric of the suit.

We mark the places for the buttons.

We fold the thread in several layers, thread it into a needle, fold it in half, and tie a knot. We pierce the fabric and hide the knot with a few stitches.

We crochet a chain of air loops.

Carefully sew around the base of the loop, hide the thread, and cut it.

We tighten the buttons into knitwear. Cut out circles with a diameter larger than the buttons. If the fabric is thin, you can make a double layer so that the button itself does not show through.

Place the button on the wrong side of the circle, pull it together and sew the ends together randomly. To comfortably tighten the circle, sew around its perimeter. We do not cut the threads with the needle.

Sew on one button.

Then the second one, closing the base of the loop.


We cut out 2 stripes for the belt and a loop along the width of the buckle. The length is determined by the girth of the abdomen, adding the desired length of the free edge.

Place the strips together face to face. In the middle at the end we mark the place for the tongue, stepping back from the edge. We lay lines above and below this gap.

We thread the strip into the buckle, insert the tongue into the hole, fold the parts of the belt and, without tucking the edges, sew along the perimeter. We sew the ends of the loops together, turn them right side out and put them on the strap. Mark the location for the holes.

We cut out small holes (it’s convenient to do this with a seam ripper) and sew them by hand along the edge.


Cap
We cut it out and line it with cotton wool.


The same fabric is used for the interior.
We sew and turn it inside out.


We cut 2 strips along the width of the cap. The wool used here is the same as for the vest.

Place them together face to face and sew along one edge. Trim the allowance at the ends.

Iron the seam. We apply the resulting unfolded part to the knitwear. Cut out the inner part from knitwear as in the photo.

Sew the ends of the knitted part and the remaining ends of the front part. Let's put it together. Place the knitted strip face up and place the wool strip face up on its edge. We stitch close to the edge.

This is what the inside looks like.

Now we turn it inside out. We have a knitted part on top of the woolen part. So we put it under the paw sewing machine. Fold the edge of the knitwear evenly over the edge of the wool and sew a stitch. We make sure that the knitwear under the foot does not move forward too much.


Assembling the strip with the cap. We place it on the edge of the cap with the wool part outward with sufficient allowance. We fix it at 4 points at equal distances. We sew along the perimeter.


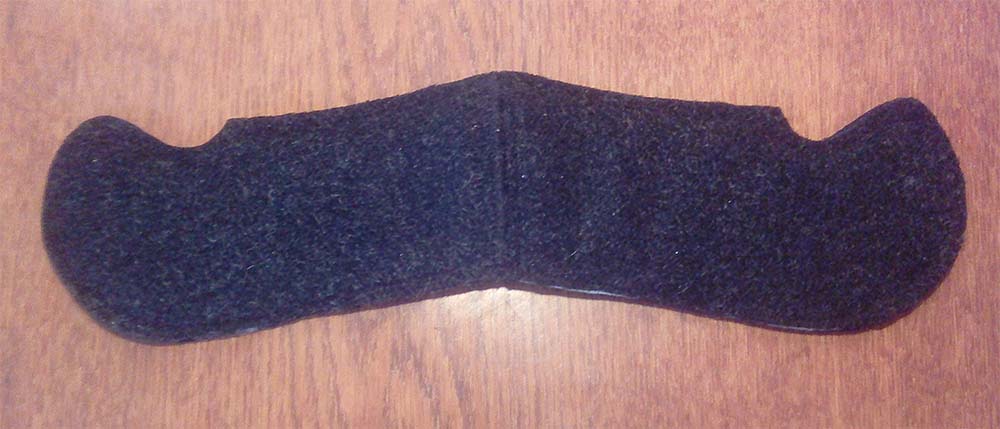
Shoes
Let's make a pattern.

It is better to check the result on paper: sew a shoe from it and, if necessary, correct discrepancies in the length of the sidewalls and the sole.

We cut out the details. Here the shoes themselves are entirely made of wool, and padding is made from padding polyester.


We collect these “sandwiches” and stitch them close to the edge. If necessary, smooth the edges.


We sew the sides of the shoes together edge to edge.

Hand sew the top together using a blanket stitch.

Cut out rectangles for the top. We sew the ends of each. We trim the top edges with a stitch.

Put it on top edge shoe and sew it on by hand. First with small straight stitches, then overcast stitches.

We sew the sole with a blanket stitch, starting from the nose.

We make 2 pom-poms from fur and sew them on the noses.

Ready! They turned out soft and cute.


And the general view.


Perhaps you will say that it does not quite look like gnomes. Yes, white fur is more associated with Father Frost or Snow Maiden. But we gave all the recommendations. No beard? And who said that these cannot be the children of gnomes who have not yet grown it?


Popular
- Making charming baskets from newspaper tubes using a cardboard box
- Kiss tattoo for men. Kiss tattoo. The meaning of tattoos for men
- The safety of plastic toys
- Winter safety shoes: men's and women's, insulated
- Increased protein in urine: possible causes and treatment Quantitative methods of assessment
- Knitting booties: elegant and casual patterns, patterns with descriptions and recommendations
- How is World Heart Day celebrated?
- Knitted children's pullover with cat applique
- You need to know this: how to get a ticket to kindergarten - step-by-step instructions for parents
- Birthday card for grandma from her grandson or granddaughter