How to make Santa Claus from palms step by step. New Year's crafts from paper palms. Simple paper crafts
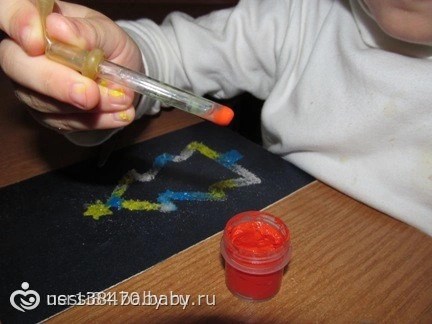
New Year's crafts from paper palms- this is an exciting entertainment, an interesting activity for children in preparation for the New Year. Making a paper palm is very easy. On a sheet of paper, draw a hand with outstretched fingers and cut it out along the contour. Children really like it when their hands are traced, as it tickles a little and makes them laugh.
Crafts made from palms very well develop children’s imagination and imagination, because in the prepared element or set of elements it is necessary to discern a certain picture finished product. This process can be called design. Children, as a rule, have well-developed associative (figurative) thinking and therefore it is not difficult for most children to discern a bird or animal in a paper palm. All that remains is to add the necessary touches to turn an ordinary handprint into an artistic masterpiece. The task of parents is to help bring these fantasies to life.
TO New Year's holidays, for interior decoration you can make a lot various crafts. Crafts made from the paper palms of all family members are perfect for wall decoration. Palms can be cut out of white or colored paper. They can be decorated with multi-colored paints. Or you can make prints on a sheet of paper with your palm, which has already been painted. Then cut out this print. This option is great for young children who find it difficult to keep the pen in one place while tracing it on paper.
You can create a variety of different things from paper palms. New Year's figures, which will become a source of pride and joy for your kids.
Snowflake
You will need at least six paper palms. But if you do more, the snowflake will turn out more “fluffy”. We glue our palms together, placing them like a fan, until the circle is closed. To add volume to the snowflake, you need to glue the same snowflake on top, but smaller in size. Snowflakes consisting of several colors look very nice. In creating such New Year's miracle The whole family will be able to participate, because everyone has their own palm size. You can place an openwork paper snowflake in the center.
Snowman
If you have several snowflakes made from paper palms of different sizes, then you can make a snowman from them. Glue two or three snowflakes together. We also make the snowman’s hands from palms glued into a chain. To decorate the snowman you will need additional elements. You can draw the snowman's face on the top snowflake or glue on eyes, mouth and nose cut out of colored paper. Let's add a hat, cap or bucket to the snowman's head, which can also be cut out of colored paper or cardboard. And we’ll give you a broom in your hands; for the handle, the palms are glued together with a chain, and for the broom, with a fan.
Herringbone
It can be produced in two versions.
- Flat Christmas tree as a wall decoration. To make it you will need palms cut out of green paper or painted in green. The quantity depends on the desired size of the tree. They start gluing the palms from the bottom of the Christmas tree, going up. In each new row the number of palms is reduced. The finished Christmas tree can be decorated with snowflakes, colored circles, and the fingertips can be tinted with white paint, creating a feeling of being dusted with snow.
- Volumetric Christmas tree. To make it, you will need a frame twisted from a sheet of cardboard in the shape of a cone. On this cone, starting from the bottom row, glue green paper palms. We decorate to your taste.

Father Frost and Snow Maiden
These figures are performed approximately the same way. The palms will need several colors: white and red for Santa Claus, white and blue for the Snow Maiden. The number of palms depends on the size of the finished figure. We start work from the bottom row, lay out and glue the palms together white. Next, color rows begin, in which we gradually reduce the number of palms. If you plan to make a small figure, then the upper part of the body and arms can be cut out of colored paper. But if a large figure is conceived, then it is better to make it entirely from palms, cutting out only the hands from paper. At the same time, the hands are a colored palm, and the fur trim of the mitten is a white oval. For Santa Claus, you need to make a beard, as well as a mustache and hair from white palms. If you slightly “twist” the tips of your fingers on your palms, your beard and hair will look voluminous. We cut out an oval from a white sheet of paper and draw grandfather’s face on it, decorating it with a mustache on top. We decorate the head with a red hat made of colored paper. Felt boots can be cut from white or red paper. For the Snow Maiden, we glue on the fur trim of the fur coat, as well as the collar, from white palms. Cut out an oval from white paper and draw a face on it. Decorate with paper hair yellow. It is advisable to do long braid. And glue the kokoshnik on top of the head. We cut out felt boots from white or blue paper.
Owl
Enough simple figure, made from palms. We make a circle of large palms. Glue a smaller circle on top. This will be the body of the owl. Another small circle will be placed above the body - this is the head. The wings are made in the shape of a fan in two rows of palms. The upper part of the wing can be bent inward, this will look more realistic. All that remains is to make the eyes and beak. Cut them out of colored paper. We make the base for the figure-eight eyes from yellow paper. Along the edge of the entire base, you need to make a fringe with scissors and fluff it slightly. Glue the eyes on top and draw the pupils. We make the beak in the shape of a triangle. You can lightly tint the owl's plumage (the tips of the fingers on the palms) with a gray or yellowish color.
Links
- Crafts from pasta for the New Year
- Crafts made from matches, social network for parents "Country of Mothers"
- Winter crafts with plasticine, social network for parents "Country of Mothers"
- New Year's decorations made from salt dough, social network "Country of Mothers"
Galina Kovaleva
Decorating for the New Year is an exciting activity, especially if you make the decoration yourself. Today we offer you a master class on crafts “Our beloved Santa Claus”. Santa Claus is the main symbol of the New Year. The children are looking forward to his arrival. Our master class: Santa Claus craft from a child's palm.
To make such a Santa Claus, you don’t need any templates. We only need: colored cardboard, white paper, glue, scissors, a simple pencil and cotton wool.
Children trace their palms on cardboard.
Carefully cut along the contour. If your child is not good at cutting, then he should get a little help.
The palm is cut out. Cut out a circle or oval from white paper to make a face. Glue the face so that the thumb is on top. It will make a very beautiful hat.
Now we lubricate the fingers of the palm with glue (don’t touch the big one) and carefully glue the pre-prepared cotton balls.
We also coat the top of the face with glue and glue cotton balls to create the edge of the cap. To the tip thumb glue on the pompom. Santa Claus from the palm is ready. If you glue a ribbon or thread to it, you can hang it on the Christmas tree as a decoration.
If only you could see with what pleasure the children did this work. For them it was a real holiday. After all, everyone made their own Santa Claus.
Girls, NG is ahead. And every mother wants to make the holiday more memorable for her child. I decided to collect in my post a lot of ideas for preparing for the New Year with a child. I divided everything into thematic classes. It turned out to be a lot... it’s probably unrealistic to do it all in a month. But it’s okay, the whole winter is ahead)))
" Winter, snow"
1. Raska we call about winter as a season
2. Go to the forest and have a photo shoot
3. Get to know each other yours with snowflakes. Drawing. Cut it out of paper. We hang it on the windows. Templates http: //adalin.mospsy. ru/ny/novogodnie-vyityinanki.shtml
4. Make snowflakes on the windows using toothpaste. Cut out a snowflake from paper. After slightly moistening it with water, glue the snowflake onto the glass. Gently blot off excess liquid around the snowflake with a dry cloth. Now in some container you need to dilute a little toothpaste with water. To decorate a window for the New Year, you should use white toothpaste, without colored stripes. Now let's get started New Year's decoration windows in the so-called "spray technique". Dip a toothbrush into the toothpaste and water and spray it onto the glass. The first splashes are too large (=ugly), so you need to shake them off somewhere, and only then splash them on the window. Wait a little until it dries and peel off the snowflake.


5. Paint on the snow
6. Drawing, applique.
Paint the sheet with blue/blue paint and paint the snow with salt (semolina) until it’s dry.
Cut out the houses, and the child should glue them onto a blue sheet and spray paint with a toothbrush (brush)

Snow can be made using cotton wool - glue it on PVA
Drawing with a cotton swab

Finger painting

"Snowman"
1.Meeting the Snowman. Show pictures and read poems.
2.Watching the cartoon “Snowman-Postman”
3. Consider the picture. We tell you: How are the children dressed? - The children are dressed in winter clothes, V warm hats and mittens, scarves tied around the neck. What are the children doing? - Children are making a snowman. What is a snowman made from? - The children make it out of snow. Why do children need sleds? - To ride downhill, or along paths, and you can also bring a heavy lump of snow onto them. How many snowballs does a snowman consist of? - A snowman is made from three lumps.

4. We sculpt a snow woman from snow or, at worst, from plasticine.
5. Exercise “Snowman”.
Come on, buddy, be brave, buddy,
Roll your snowball in the snow We go in circles.
It will turn into a thick lump We move our hands in the air, marking a large circle.
And the lump will become a snowman. We move our hands in the air, marking several small circles.
His smile is so bright! We smile.
Two eyes, a hat, a nose, a broom. We show our eyes, cover our head with our palm, show our nose, raise our hand up and spread our fingers, depicting a broom.
But the sun will burn slightly -
Alas! - and there is no snowman. We squat and spread our arms to the sides
6. Another exercise:
We went for a walk in the yard
One, two, three, four, five, (Fold your fingers one at a time.)
We came to the yard for a walk.
They sculpted a snow woman. (Imitate sculpting lumps.)
The birds were fed crumbs, (Crush the bread with all your fingers.)
Then we rode down the hill. (Run the index finger of your right hand along the palm of your left hand.)
And they were also lying in the snow. (Place your palms on the table with one side or the other.)
Everyone came home covered in snow, (Shake off your palms.)
We ate soup and went to bed. (Make movements with an imaginary spoon, place your hands under your cheek.)
7. Application: snowman made of cotton pads and snow-salt
8. You can make a snowman out of a refrigerator or door


9. Garland of snowmen - cut out, paint

10. We turn on the snowman song and dance, perform the movements according to the words of the song.
"Herringbone"
1.Introduction to the Christmas tree. We read poems (if possible, learn at least 1). Let's look at the pictures.
2. We listen to songs, we can do a dance. “The little Christmas tree is cold in winter”
3. Watch cartoons about the Christmas tree.
4. Lay out the Christmas tree from mosaics, construction sets, geometric shapes

5. Drawing. Christmas tree made from palms with paints. Applique – gifts made from multi-colored paper

6. Application. Decorate a Christmas tree blank made of colored paper with plasticine balls

7. Drawing with a stencil. We cut out the Christmas tree on a sheet of paper, we get a template, cover it with a second blank sheet, and secure it with paper clips. We take a piece of sponge and use it to apply paint to the sheet. When everything is painted, we remove the paper clips and remove our template, leaving a very beautiful Christmas tree. While the paint is still wet, give your child semolina and let him sprinkle “snow” on his creation!
8. Christmas tree made of threads or other materials. I plan to decorate the windowsill with them


9. The New Year's herringbone applique can be made from plain or multi-colored strips of paper. Strips of paper can be replaced with colored tape or braid.


10. Application. Make a Christmas tree from your palms, decorate with toys

11. 11. Christmas tree made from a footprint

12. Another applique.

"On the Christmas tree"
We had fun at the Christmas tree Rhythmic hand clapping.
We danced and frolicked. Rhythmic fist bumps.
After good Santa Claus “Walking” with the middle and index fingers
He brought us gifts. fingers on the table.
Gave huge packages They “draw” a large circle with their hands.
They also contain tasty items: Rhythmic clapping.
Candies in blue papers, Bend on both hands alone
Nuts next to them finger, starting with the thumb.
Pear, apple, one
Golden tangerine.
"Herringbone"
Waiting for the prickly beauty They “draw” a Christmas tree with their hands.
In every home in December. Make a “house” with your palms.
Lanterns will be lit on the branches, Flashlights are shown.
Sparks fly in the silver. Hands above head, fingers protruded.
The house will immediately become festive, They hold hands and dance in a circle.
A round dance will begin.
Santa Claus is in a hurry with gifts, Walking in circles with an imaginary
Coming New Year. a bag over your shoulders.
14. Christmas tree made of PVA and semolina
15. Do Christmas tree decorations from cones. Can be covered with glitter


16. You can make balls of thread for a Christmas tree or a snowman


17. Decorate the Christmas tree together
"Father Frost"
1.Tell about Santa Claus in a way that the child can understand, tell him in words that he understands, and not only tell him, but also show him, teach him to distinguish in the pictures where our Grandfather Frost is and where Santa Claus is! He is dressed in a blue or red long fur coat; he wears a hat and mittens to match the color of the fur coat. He has felt boots on his feet, a staff in one hand, and a bag with gifts in the other. Santa Claus is the owner of a long white beard and a beautiful white mustache. Santa Claus's hair is also snow-white, and his eyebrows stand out on his face with white arches. Santa Claus rides on three horses harnessed to a sleigh. Show pictures
2.Explain that Santa Claus likes to freeze everything around him. We make a beautiful ice garland that we can take with us on a walk and decorate any tree or bush with it. The child helps you pour water and paint it with a brush.


3. Reading poems about Santa Claus (learning)
4. We give our Santa Claus a beautiful fluffy beard and mustache! We take cotton wool, the child tears off small pieces and glues them onto drops of glue.
5. Drawing. Santa Claus card with handprint


6. Tell us how Santa Claus moves. Family prints "Deer"

7. Let's do Christmas decorations from salt dough/plaster. You can give it to your grandparents for New Year's Eve.

"Snow Maiden"
1. Let's talk about the Snow Maiden. She was made by a childless woman and grandfather. They sculpted it from snow with love, for their joy, and for consolation in old age. And when they blinded her, the Snow Maiden turned from a snow girl into a living girl, because love can work miracles. She grew up quickly, and very soon became a beautiful girl!
2. We read a Russian fairy tale - “The Snow Maiden”, watch a cartoon.
3. Decorate the Snow Maiden’s dress. Mom needs to prepare white plasticine and mini snowflakes from foil in advance. We need to attach as many snowflakes as possible to the Snow Maiden’s dress! First we attach the plasticine, then snowflakes on top of it. Or you can simply glue snowflakes onto her dress with glue, but then you need to cut them out of silver colored paper.
New Year's set of tasks https: //yadi. sk /d /G _cPB _9KCv 3HM
Here you will find various winter games and entertainment for children http: //www. kokokokids. ru/2013/01/big-winter-post-2013.html
But such a book can be purchased. There's everything, everything, everything))) a large section with various drawing techniques, games for indoors and outdoors, making feeders, a special section about preparing for the New Year: New Year's decor, advent calendars, homemade cards and gifts, as well as interesting ways to give them! And as a bonus - huge list traditions, rituals and just pleasant little things that you can take note of and apply in your family in the coming year)

Well, I also wanted to write about the advent calendar... But only later.
P.S. Girls, if you have any other ideas, show me! I will also be glad to see your December classes. There will be reports from me later too
Natalia Maslova
MASTER CLASS"GRANDFATHER FROST FROM YOUR PALM»
Prepared: Maslova N.V.
For work we need:
Colored paper
White paper, for cutting palms
Scissors
Gouache (RED)
Colored pencils for drawing faces
Wallpaper or Whatman paper
Work progress:
To make Grandfather Freezing we need to cut about 100 palms. Paint less than half with red gouache.
The next steps are to cut out the head from white paper. We cut out the eyes and mouth, glue it on, and shade the face with a pinkish pencil.
On the wallpaper we draw and cut out the torso of Grandfather Frost. We also cut out arms, legs, a hat and snowflakes from colored paper, as well as felt boots from red paper.


We glue everything.
And the final stage is collecting our Grandfather Frost. We will start gluing from white palms beard,

after the beard we glue the hem of our Grandfather’s fur coat Frost. 2 rows of white then red.

Our Grandfather Freezing ready to decorate the group "Sun". And also the Snow Maiden, granddaughter of Grandfather, was made using the same principle Frost and Christmas tree.
Publications on the topic:
Application "Chamomile - a flower from children's palms" (master class) Every year on July 8, "Day of Family, Love and Fidelity" becomes everything.
The New Year is getting closer, there are more and more worries, we need to think about the decoration, prepare for the holiday, and take care of the costumes. And then there's this.
I invite all my colleagues and friends to the “Santa Claus” master class using origami techniques, which Susanna will show you. For work we need a colored sheet.
I want to tell you the “secret” and show you the surprise that is already waiting for our kids in the swimming pool. These are such cute Santa Clauses.
A handmade Santa Claus doll will bring the holiday to any home. And it doesn’t matter whether you believe or not in a magical grandfather with a bunch of gifts.
Happy New Year is coming soon! Christmas tree, rain, tangerines and, of course, Santa Claus with gifts! Dear colleagues, I propose to yours.
On the eve of the family holiday, the guys and I decided to do some crafts. There were many offers. But everyone agreed on one thing - to do it.
Popular
- Presentation on the topic “when did clothes appear?” This knowledge may be useful in
- Master class on knitting polypropylene bags Crochet polypropylene
- Irregular contractions Abdominal prolapse before childbirth
- Why do children develop aggressive behavior?
- Useful properties of Vaseline that you didn’t know about What is Vaseline and why is it needed?
- The right choice of hand cream against cracks and dryness
- How to prepare facial milk at home and use it correctly?
- Crochet toys with descriptions and patterns for beginners, patterns, professional amigurumi knitting
- Calculation of old age pension, or counting your pension yourself
- How I brought my husband back to the family